Monday, December 12, 2011

Linq - Multiple Result set of Procedure using LINQ to SQL

In this article i will show you how to return multiple result set of stored procedure using Linq to SQL.


As you probably know LINQ to SQL supports stored procedure (SP). You can drag & drop a SP in the LINQ to SQL Designer and the magic happens: a new method inside the DataContext class is generated and a new return type is defined by the designer to represent this result (the name of the type is composed by the SP name followed by Result).


It is possible to read multiple result set of procedure using Linq.In general scenario when you drag and drop procedure in .dbml its always returns ISingleResult and only consider first result, based of first result it will create data contracts.


Now let see how we can read multiple result set using LINQ


Step 1
Download northwind database from the following link.
http://www.microsoft.com/downloads/details.aspx?FamilyID=06616212-0356-46a0-8da2-eebc53a68034&displaylang=en

Step 2
Attach a northwind database into MS-SQL server.


Step 3
Lets Create a  stored procedure of  multiple results.Execute below stored procedure in Northwind Database 
CREATE PROC [dbo].[SPViewData]
 @ContactName Nvarchar(30)
AS
 /*Get Employee Data*/ /* No Parameter */
 SELECT TOP 5 Employees.FirstName,Employees.LastName,Employees.City FROM Employees
 
 /*  Get Customers Data */ /* With Parameter */
 SELECT Customers.ContactName,Customers.City FROM Customers
  WHERE Customers.ContactName=@ContactName
GO

Step 4
Create a Web Application and give the solution name as SolMultipleResultSetLinqToSQL.


Step 5
Add a App_Code Folder,Add Linq to SQL class,Right click on App_Code Folder and select Add New Item, select LINQ to SQL classes from installed Visual Studio templates and name it NorthwindDC and click on add button,it is look like this


Click on image for better view


Step 6
Open a O/R Designer by double click on NorthwindDC.dbml,it is look like this


Click on image for better view


Click on image for better view


Visual stdio provides an object-relational mapping designer,called the O/R Designer which allows you to visually design the object to database mapping.

Step 7
To map Tables and stored procedure in DataContext class.go to the server explorer,select northwind database,go to the Stored Procedure and select SPViewData stored procedure and select Employees table and Customers table from Table ,it is look like this


Click on image for better view

Drag and drop Employees and Customers Table and SpViewData stored procedure from Server explorer onto the design surface of the O/R Designer,it is look like this


Click on image for better view

When you drag and drop this procedure you can see function in NorthwindDC.designer.cs file which look like following
[global::System.Data.Linq.Mapping.FunctionAttribute(Name = "dbo.SPViewData")]
    public ISingleResult<SPViewDataResult> SPViewData([global::System.Data.Linq.Mapping.ParameterAttribute(Name = "ContactName", DbType = "NVarChar(30)")] string contactName)
    {
        IExecuteResult result = this.ExecuteMethodCall(this, ((MethodInfo)(MethodInfo.GetCurrentMethod())), contactName);
        return ((ISingleResult<SPViewDataResult>)(result.ReturnValue));
    }


You can see it generates ISignleResult result and having only single entity which is SpViewDataResult and when we see the definition of SpViewDataResult class we can see that it only consider Employees results and exclude Customers result.


Click on image for better view

Step 8
To get  multiple results we have to create new file having same class name and added with partial keyword.The method should be in same namespace and with same class,it is look like this
using System;
using System.Collections.Generic;
using System.Data.Linq.Mapping;
using System.Linq;
using System.Reflection;
using System.Web;
using System.Data.Linq;

/// 
/// Summary description for NorthwindDCDataContext
/// 
public partial class NorthwindDCDataContext
{
    [FunctionAttribute(Name = "dbo.SpViewData")]
    [ResultType(typeof(Employee))]
    [ResultType(typeof(Customer))]
    public IMultipleResults GetMultipleResultSet([System.Data.Linq.Mapping.ParameterAttribute(Name="ContactName", DbType="NVarChar(30)")] string ContactName)
    {
        try
        {
            IExecuteResult result = this.ExecuteMethodCall(this, ((MethodInfo)(MethodInfo.GetCurrentMethod())),ContactName);
            return (IMultipleResults)(result.ReturnValue);

        }
        catch (Exception ex)
        {
            throw new Exception(ex.Message); 
        }
    }
}

We have added Employee and Customer as ResultType as our procedure is returning these two result sets, this will going to use by MethodInfo in order to return IMultipleResults. In addition to this we have to change return type, it was before ISingleResult now we have to make it IMultipleResults and finally we add ParameterAttribute in method which user set a parameter value for stored procedure.Now our method is ready to return multiple results.


Step 9
Add a two GridView on page it's look like this
<%@ Page Language="C#" AutoEventWireup="true"  CodeFile="Default.aspx.cs" Inherits="_Default" %>

<!DOCTYPE html PUBLIC "-//W3C//DTD XHTML 1.0 Transitional//EN" "http://www.w3.org/TR/xhtml1/DTD/xhtml1-transitional.dtd">

<html xmlns="http://www.w3.org/1999/xhtml">
<head runat="server">
    <title></title>
</head>
<body>
    <form id="form1" runat="server">
    <div>
        <h2>Employee Data</h2>
        <asp:GridView ID="GvEmployee" runat="server" AutoGenerateColumns="False" 
            EnableModelValidation="True">
            <Columns>
                <asp:BoundField DataField="FirstName" HeaderText="FirstName" />
                <asp:BoundField DataField="LastName" HeaderText="LastName" />
                <asp:BoundField DataField="City" HeaderText="City" />
            </Columns>
        </asp:GridView>

        <h2>Customer Data</h2>
        <asp:GridView ID="GvCustomer" runat="server" AutoGenerateColumns="False" 
            EnableModelValidation="True">
            <Columns>
                <asp:BoundField DataField="ContactName" HeaderText="ContactName" />
                <asp:BoundField DataField="City" HeaderText="City" />
            </Columns>
        </asp:GridView>

    </div>
    </form>
</body>
</html>

Step 10
Get the results form IMultipleResults and bind data to the GridViews,it is look like this
using System;
using System.Collections.Generic;
using System.Linq;
using System.Web;
using System.Web.UI;
using System.Web.UI.WebControls;
using System.Data.Linq;

public partial class _Default : System.Web.UI.Page 
{
    protected void Page_Load(object sender, EventArgs e)
    {
        try
        {
            if (IsPostBack == false)
            {
                ViewData();
            }
        }
        catch (Exception)
        { 
        }
    }

    #region Methods

    private void ViewData()
    {
        try
        {
            //Create a Object of Northwind DataContext Class
            NorthwindDCDataContext DC = new NorthwindDCDataContext(System.Configuration.ConfigurationManager.ConnectionStrings["NorthwindConnectionString"].ConnectionString.ToString());

            // Get Multiple Result Set and Store in IMultipleResults Interface
            IMultipleResults Results = DC.GetMultipleResultSet("Thomas Hardy");

            // Get Employee Data from IMultipleResults Interface Object
            var Employees = Results.GetResult<Employee>().ToList<Employee>();

            // Get Customer Data from IMultipleResults Interface Object
            var Customers = Results.GetResult<Customer>().ToList<Customer>();

            //Bind Employee Data to gridview
            if (Employees != null)
            {
                if (Employees.Count >= 0)
                {
                    GvEmployee.DataSource = Employees;
                    GvEmployee.DataBind();
                }
            }

            // Bind Customer Data to gridview
            if (Customers != null)
            {
                if (Customers.Count >= 0)
                {
                    GvCustomer.DataSource = Customers;
                    GvCustomer.DataBind();
                }
            }
        }
        catch (Exception ex)
        {
            throw new Exception(ex.Message); 
        }
    }


    #endregion
}

Run the Project.


Output
Click on image for better view


Download
Download Source Code

Tuesday, December 6, 2011

MS-SQL - Full Text Index in MS-SQL Server

Full Text Index helps to perform complex queries against character data.  These queries can include word or phrase searching. We can create a full-text index on a table or indexed view in a database. Only one full-text index is allowed per table or indexed view. The index can contain up to 1024 columns.


Let see how to create full text search index in MS-SQL Server.For this Example i will take Northwind Database.


Step 1
Download Northwind database from the following link.
http://www.microsoft.com/downloads/details.aspx?FamilyID=06616212-0356-46a0-8da2-eebc53a68034&displaylang=en

Step 2
Attach a Northwind database into MS-SQL server.


Step 3
Create a Full Text Catalog,it is look like this


Click on Image for better view


Specify Full Text Catalog Name,it is look like this


Click on Image for better view


Now Full Text Catalog is Ready,it is look like this


Click on Image for better view


Step 4
Create a Full Text Index,it is look like this


Click on Image for better view

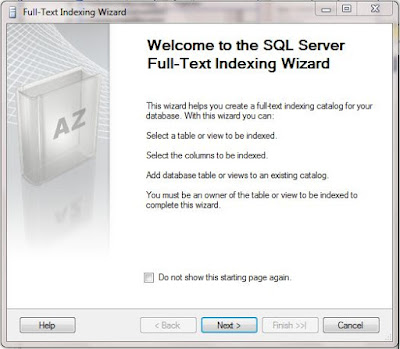
Full Text Index wizard will open, it is look like this


Click on Image for better view


Select Unique Index for the table,it is look like this.
Note. - In Northwind database there is no primary key on Employees table so create primary key on Empoyees table before selecting Unique Index for Full Text Index.


Click on Image for better view


Select a Table Columns for Full Text Queries,it is look like this


Click on Image for better view


Select Change Tracking,it is  look like this


Click on Image for better view


Select Catalog Name,it is look like this


Click on Image for better view


Define Population Schedules(Optional),it is look like this


Click on Image for better view


Full Text Index Description,it is look like this


Click on Image for better view


Click on Image for better view


Step 5
Populate the Index,it is look like this


Click on Image for better view


Click on Image for better view


As the full text index is created and populated,now we can write a query for searching records on desired table which provide better performance.


Step 6
For Example,we will find Employee Records who has 'Manager' in their Title.


FREETEXT( ) Is predicate used to search columns containing character-based data types. It will not match the exact word, but the meaning of the words in the search condition. When FREETEXT is used, the full-text query engine internally performs the following actions on the freetext_string, assigns each term a weight, and then finds the matches.
  • Separates the string into individual words based on word boundaries (word-breaking).
  • Generates inflectional forms of the words (stemming).
  • Identifies a list of expansions or replacements for the terms based on matches in the thesaurus.
USE Northwind

SELECT * FROM Employees
 WHERE FREETEXT(Employees.Title,'Manager')


Click on Image for better view


CONTAINS( ) is similar to the Freetext but with the difference that it takes one keyword to match with the records, and if we want to combine other words as well in the search then we need to provide the “and” or “or” in search else it will throw an error.

USE Northwind

SELECT * FROM Employees
 WHERE CONTAINS(Employees.Title,'President OR Manager')
 
SELECT * FROM Employees
 WHERE CONTAINS(Employees.Title,'Sales AND Representative')


Click on Image for better view


Full text indexing is a great feature that solves a database problem, the searching of textual data columns for specific words and phrases in SQL Server databases. Full Text Index can be used to search words, phrases and multiple forms of word or phrase using FREETEXT() and CANTAINS() with “and” or “or” operators while LIKE Operator will search for the words that contain part of the search string.

Saturday, December 3, 2011

ASP.net - Google Map Version 3 in ASP.net

Google Map Version 3 API is especially designed to be faster and more applicable to mobile devices, as well as traditional desktop browser applications.


In this article i will show how to bind google map in asp.net project and some basic feature of google map.


Good News for web developer there is no more API registration key needed for Version 3.0.
Thanks to Google Corporation.


Step 1
Download JQuery Script from the following Link
JQuery 1.7.1


Step 2
Create a Web application and give the solution name as SolGoogleMap


Step 3
First we need to create a page,it is look like this
<body>
    <form id="form1" runat="server">
    <div>
        
       <table border="0" cellpadding="5"  cellspacing="5" width="100%" align="center">
            <tr>
                <td style="width:60%">
                    <asp:TextBox ID="txtAddress" runat="server" Height="32px" Width="530px"></asp:TextBox>
                </td>
                <td style="width:40%">
                    <asp:Button ID="btnSearch" runat="server" Text="Search Map" Height="32px" Width="200px"/>
                </td>
            </tr>
            <tr>
                <td colspan="2" style="height:100%">
                   <div id="GoogleMapCanvas" style="height:510px;"></div>
                </td>
            </tr>
       </table>

    </div>
    </form>
</body>


Click on Image for better view


Step 4
Add jQuery file Reference inside the head tag of the page,it is look like this
<script language="javascript" type="text/javascript" src="Scripts/jquery-1.7.1.min.js"></script>

Step 5
We need to add Google Map V3 API reference in head tag,it is look like this
<script type="text/javascript" src="http://maps.google.com/maps/api/js?sensor=false&libraries=places&language=en-AU"></script>

Step 6
Bind Address to the textbox control,we can use Google API to have an autocomplete for address,it is look like this
<%--The Following Script to bind google places(address) to the textbox (AutoCompleteTextbox) --%>
    <script type="text/javascript">

        $(document).ready(function () {

            var autocomplete = new google.maps.places.Autocomplete($("#txtAddress")[0], {});

            google.maps.event.addListener(autocomplete, 'place_changed', function () {
                var place = autocomplete.getPlace();
            });


        }
        );
        
    </script>

My Home Town Address

Click on Image for better view


Step 7
Now Initialize Google Map on body onload event,it is look like this.
First write script to intialize google map.
<script type="text/javascript">

        var geocoder;
        var map;

        function InitializeGoogleMap() {

            try {

                geocoder = new google.maps.Geocoder();
                // Location of the Mumbai,Thane
                var LatitudeLongitude = new google.maps.LatLng(19.1969813, 72.9962491);
                var GoogleMapOptions = {
                    zoom: 10,
                    center: LatitudeLongitude,
                    mapTypeId: google.maps.MapTypeId.ROADMAP
                }
                map = new google.maps.Map($("#GoogleMapCanvas")[0], GoogleMapOptions);


            }
            catch (E) {
                alert(E.Message);
            }

        }
    
    </script>


Then call InitializeGoogleMap function on body onload event,it is look like this
<body onload="InitializeGoogleMap(); return false">


Location of Mumbai-Thane

Click on Image for better view


Step 8
Add a Marker and Info Window on Google Map,it is look like this
function AddMarkerWithInfoWindow() {
            try {

                var Address = $("#txtAddress").val();

                // Add Marker
                geocoder.geocode({ 'address': Address }, function (results, status) {
                    if (status == google.maps.GeocoderStatus.OK) {
                        map.setCenter(results[0].geometry.location);
                        var Marker = new google.maps.Marker({
                            map: map,
                            position: results[0].geometry.location
                        });

                        // Open Info Window
                        var infowindow = new google.maps.InfoWindow(
                        {
                            content: $("#txtAddress").val()
                        }
                        );
                        google.maps.event.addListener(Marker, 'click', function () {
                            infowindow.open(map, Marker);
                        });

                    } else {
                        alert("Geocode was not successful for the following reason: " + status);
                    }
                });

            }
            catch (E) {
                alert(E.Message);
            }
        }

Call AddMarkerWithInfoWindow function on btnsearch onclientclick event,it is look like this
<asp:Button ID="btnSearch" runat="server" Text="Search Map" Height="32px" Width="200px" OnClientClick="AddMarkerWithInfoWindow(); return false" />

Full Code
<%@ Page Language="C#" AutoEventWireup="true"  CodeFile="Default.aspx.cs" Inherits="_Default" %>

<!DOCTYPE html PUBLIC "-//W3C//DTD XHTML 1.0 Transitional//EN" "http://www.w3.org/TR/xhtml1/DTD/xhtml1-transitional.dtd">

<html xmlns="http://www.w3.org/1999/xhtml">
<head runat="server">
    <title>Google Map Version 3 in ASP.net</title>

    <script language="javascript" type="text/javascript" src="Scripts/jquery-1.7.1.min.js"></script>

    <script type="text/javascript" src="http://maps.google.com/maps/api/js?sensor=false&libraries=places&language=en-AU"></script>

     <%--The Following Script to bind google places(address) to the textbox (AutoCompleteTextbox) --%>
    <script type="text/javascript">

        $(document).ready(function () {

            var autocomplete = new google.maps.places.Autocomplete($("#txtAddress")[0], {});

            google.maps.event.addListener(autocomplete, 'place_changed', function () {
                var place = autocomplete.getPlace();
            });


        }
        );
        
    </script>

    <script type="text/javascript">

        var geocoder;
        var map;

        function InitializeGoogleMap() {

            try {

                geocoder = new google.maps.Geocoder();
                // Location of the Mumbai,Thane
                var LatitudeLongitude = new google.maps.LatLng(19.1969813, 72.9962491);
                var GoogleMapOptions = {
                    zoom: 10,
                    center: LatitudeLongitude,
                    mapTypeId: google.maps.MapTypeId.ROADMAP
                }
                map = new google.maps.Map($("#GoogleMapCanvas")[0], GoogleMapOptions);


            }
            catch (E) {
                alert(E.Message);
            }

        }

        function AddMarkerWithInfoWindow() {
            try {

                var Address = $("#txtAddress").val();

                // Add Marker
                geocoder.geocode({ 'address': Address }, function (results, status) {
                    if (status == google.maps.GeocoderStatus.OK) {
                        map.setCenter(results[0].geometry.location);
                        var Marker = new google.maps.Marker({
                            map: map,
                            position: results[0].geometry.location
                        });

                        // Open Info Window
                        var infowindow = new google.maps.InfoWindow(
                        {
                            content: $("#txtAddress").val()
                        }
                        );
                        google.maps.event.addListener(Marker, 'click', function () {
                            infowindow.open(map, Marker);
                        });

                    } else {
                        alert("Geocode was not successful for the following reason: " + status);
                    }
                });

            }
            catch (E) {
                alert(E.Message);
            }
        }
    </script>

</head>
<body onload="InitializeGoogleMap(); return false">
    <form id="form1" runat="server">
    <div>
     <table border="0" cellpadding="5"  cellspacing="5" width="100%" align="center">
            <tr>
                <td style="width:60%">
                    <asp:TextBox ID="txtAddress" runat="server" Height="32px" Width="530px"></asp:TextBox>
                </td>
                <td style="width:40%">
                    <asp:Button ID="btnSearch" runat="server" Text="Search Map" Height="32px" Width="200px" OnClientClick="AddMarkerWithInfoWindow(); return false" />
                </td>
            </tr>
            <tr>
                <td colspan="2" style="height:100%">
                   <div id="GoogleMapCanvas" style="height:510px;"></div>
                </td>
            </tr>
       </table>
    </div>
    </form>
</body>
</html>


Run the Project.


Output
1. Initialize Google Map


Click on Image for better view


2. Auto-Complete Suggestion


Click on Image for better view


3. Add Marker


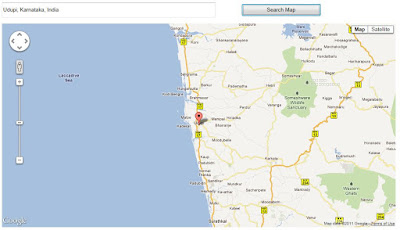
Click on Image for better view


4. Open Info Window When User Click on Marker


Click on Image for better view


Download
Download Source Code

Wednesday, October 26, 2011

Asp.net - Image Gallery Using DataList in Asp.net

In this article i will show you how to use jQuery to show a larger image when user hovers thumbnail images from a asp.net Datalist control, also use hidden img control to cache the large image when page loads which improves the performance dramatically.


Let see how to bind images in a DataList Control and show large image when user move the mouse cursor to the image using JQuery.


Step 1
First you need to download latest AJAX control toolkit(September 2011 Release) from the following Link.
http://ajaxcontroltoolkit.codeplex.com/releases/view/74023

Step 2
Create a Web Application and give the Solution Name as SolImageGallery.


Step 3
Add Ajax control toolkit on Toolbox tab.


Step 4
Save images in Folder,Create a New Folder in the Solution and give folder name as Images,it is look like this


Click on Image for better view

Step 5
Add XML file in the App_Data folder and give the file name as ImageData.xml,it is look like this


Click on Image for better view


Step 6
The XML in the following example defines an XML document with a root node called Images. This root node contains one or more nodes called Image that include elements called ImageName and ImagePath,it's look like this


    Gaara
    ~/Images/Gaara.png


    Choji Akimichi
    ~/Images/Choji.png


    Jiraiya
    ~/Images/Jiraiya.jpg


    Kakashi Hatake
    ~/Images/Kakashi.png


    Kiba Inuzuka
    ~/Images/Kiba.png
  

    Naruto Uzumaki
    ~/Images/Naruto.jpg


     Neji Hyuuga
     ~/Images/Neji.jpg


     Rock Lee
    ~/Images/RockLee.jpg


     Sai
    ~/Images/Sai.jpg


  Shikamaru Nara
    ~/Images/Shikamaru.jpg


  Shino Aburame
    ~/Images/Shino.jpg


  Yamato
    ~/Images/Yamato.jpg


Step 7
Create an ImageEntity class in App_Code Folder,it is look like this

using System;
using System.Collections.Generic;
using System.Linq;
using System.Web;

public class ImageEntity
{
    #region Property

    public String ImageName
    {
        get;
        set;

    }

    public String ImagePath
    {
        get;
        set;
    }

    #endregion
}


Step 8
Create a ImageView static class in a App_Code folder for retrieving data from XML document.it is look like this
using System;
using System.Collections.Generic;
using System.Linq;
using System.Web;
using System.Xml.Linq;


public static class ImageView
{
    #region Methods

    public static List GetImagesData()
    {
        try
        {
            // Load Xml Document  

            String XmlFile = HttpContext.Current.Server.MapPath("App_Data/ImageData.xml");

            XDocument XDoc = XDocument.Load(XmlFile);

            // Query for retriving all Images data from XML  
            var Query = from Q in XDoc.Descendants("Image")
                        select new ImageEntity
                        {
                            ImageName = Q.Element("ImageName").Value,
                            ImagePath = Q.Element("ImagePath").Value
                        };

            // return images data  
          return Query.ToList<ImageEntity>();
        }
        catch (Exception ex)
        {
            throw new Exception(ex.Message); 
        }
    }

    #endregion
}

Step 9
Add a ToolkitScriptManager control from Ajax toolkit inside the Div Tag,it is look like this
<asp:ToolkitScriptManager ID="ToolkitScriptManager1" runat="server">
</asp:ToolkitScriptManager>

This control allows you to replace the default <asp:scriptmanager> control behavior, and supports the ability to dynamically merge multiple client-side Javascript scripts into a single file that is downloaded to the client at runtime. 


Step 10
Create a CSS for view Large Image and Panel Control,it is look like this


Step 11
Drag a DataList control onto a page. Then, use the following code to set the RepeatColumns property to 4, and set the RepeatDirection property to vertical and set CellSpacing and cellpadding to 5,it is look like this
<asp:DataList ID="DataListImages" runat="server" RepeatColumns="4" RepeatDirection="Vertical" CellPadding="5" CellSpacing="5">
</asp:DataList>

Step 12
Use the following code to set the template in the DataList control to bind to a Image URL to image control and hidden image tag and Create Rounded corner panel with the help of AJAX RoundedCorners Extender,it is look like this

<ItemTemplate>

       <%--Rounded Corner Panel with AJAX RoundedCorner Extender--%>
       <asp:Panel ID="PnlImages" runat="server" CssClass="RoundedCorner">
      
       <div class="RoundedContent">
        
        <a class="ImagePreview" rel="<%#Eval("ImagePath")%>">
         
         <%--Bind Image Path in Image Control--%>
         <asp:Image ID="ImgGallery" runat="server" ImageUrl="<%#Bind('ImagePath')%>" ImageAlign="Middle" Width="150" Height="150" CssClass="ImagePreview" />
        
           <%-- Hidden Image control for caching the images--%>
         <img id="<%#Eval("ImagePath")%>" src="<%#Eval("ImagePath")%>" alt="" style="display:none"/>

        </a>
        
        <%--Bind Image Name in Label--%>
        <asp:Label ID="lblImageName" runat="server" Text='<%#Eval("ImageName")%>' style="color:Red"></asp:Label>

         </div>
    
      </asp:Panel>

                        <%--Add Rounded Corner Extender to the Panel Control--%>
        <asp:RoundedCornersExtender ID="Pnl_RoundedCorner" runat="server" TargetControlID="PnlImages" Corners="All" Radius="15"></asp:RoundedCornersExtender>

 
   </ItemTemplate>


Finally it is look like this
<asp:DataList ID="DataListImages" runat="server" RepeatColumns="4" RepeatDirection="Vertical"
  CellPadding="5" CellSpacing="5">
   <ItemTemplate>

       <%--Rounded Corner Panel with AJAX RoundedCorner Extender--%>
       <asp:Panel ID="PnlImages" runat="server" CssClass="RoundedCorner">
      
       <div class="RoundedContent">
        
        <a class="ImagePreview" rel="<%#Eval("ImagePath")%>">
         
         <%--Bind Image Path in Image Control--%>
         <asp:Image ID="ImgGallery" runat="server" ImageUrl="<%#Bind('ImagePath')%>" ImageAlign="Middle" Width="150" Height="150" CssClass="ImagePreview" />
        
           <%-- Hidden Image control for caching the images--%>
         <img id="<%#Eval("ImagePath")%>" src="<%#Eval("ImagePath")%>" alt="" style="display:none"/>

        </a>
        
        <%--Bind Image Name in Label--%>
        <asp:Label ID="lblImageName" runat="server" Text='<%#Eval("ImageName")%>' style="color:Red"></asp:Label>

         </div>
    
      </asp:Panel>

                        <%--Add Rounded Corner Extender to the Panel Control--%>
        <asp:RoundedCornersExtender ID="Pnl_RoundedCorner" runat="server" TargetControlID="PnlImages" Corners="All" Radius="15"></asp:RoundedCornersExtender>

 
   </ItemTemplate>
  </asp:DataList>


Click on Image for better view


Step 13
Create a Script file for view large image when user move to the mouse cursor to the image using JQuery,give the file name as LargeImagePreview.js
this.LargeImagePreview = function () {

 // these 2 variable determine popup's distance from the cursor
 // you might want to adjust to get the right result
 xOffset = 10;
 yOffset = 10;

 // View Large Image on Mouse Hover Event
 $("a.ImagePreview").hover(function (e) {
  //Get rel Data from hidden Image control.
  var ImgHidden = $(this).attr('rel');

  // Change String 
  // For Example - ~/Images/Kakashi.jpg to Images/Kakashi.jpg
  var ImgSrc = ImgHidden.replace("~/", "");

  // Bind Images in Paragraph tag
  $("body").append("<p id='ImagePreview'><img src='" + ImgSrc + "' alt='loading...' /></p>");

  $("#ImagePreview")
   .css("top", (e.pageY - xOffset) + "px")
   .css("left", (e.pageX + yOffset) + "px")
   .fadeIn("fast");
 },
 function () {
  $("#ImagePreview").remove();
 });
$("a.ImagePreview").mousemove(function (e) {
  $("#ImagePreview")
   .css("top", (e.pageY - xOffset) + "px")
   .css("left", (e.pageX + yOffset) + "px");
 });

};

Step 14
Add jQuery file Reference inside the head tag of the page and call LargeImagePreview function on page load event,it is look like this


Full .Aspx Code
<%@ Page Language="C#" AutoEventWireup="true"  CodeFile="Default.aspx.cs" Inherits="_Default" %>

<%@ Register Assembly="AjaxControlToolkit" Namespace="AjaxControlToolkit" TagPrefix="asp" %>


<!DOCTYPE html PUBLIC "-//W3C//DTD XHTML 1.0 Transitional//EN" "http://www.w3.org/TR/xhtml1/DTD/xhtml1-transitional.dtd">

<html xmlns="http://www.w3.org/1999/xhtml">
<head runat="server">
 <title></title>

 <style type="text/css">
  
  /* Body */
  Body
  {
   background-color:Gray;
   }
  
  
  /** for view Large Image */ 
  #ImagePreview
  {
   position:absolute;
   border:1px solid #ccc;
   background:#333;
   padding:1px;
   display:none;
   color:#fff;
   }
 
 /* Rounded Corner for Panel*/
 .RoundedCorner
 {
  background-color:White;
  width:170px;
  }
  
  .RoundedContent 
   {            
    text-align:center;
    padding:10px;                       
    }
   

 </style>

 <script language="javascript" src="Scripts/jquery-1.4.1.min.js" type="text/javascript"></script>
 <script language="javascript" src="Scripts/LargeImagePreview.js" type="text/javascript"></script>

 <script language="javascript" type="text/javascript">

  $(document).ready(function () {
   
   // Start the Script on Page Load
   LargeImagePreview();
  }
   );

 </script>

</head>
<body>

 <form id="form1" runat="server">
 <div>
  <asp:ToolkitScriptManager ID="ToolkitScriptManager1" runat="server">
  </asp:ToolkitScriptManager>

  <asp:DataList ID="DataListImages" runat="server" RepeatColumns="4" RepeatDirection="Vertical"
  CellPadding="5" CellSpacing="5">
   <ItemTemplate>

       <%--Rounded Corner Panel with AJAX RoundedCorner Extender--%>
       <asp:Panel ID="PnlImages" runat="server" CssClass="RoundedCorner">
      
       <div class="RoundedContent">
        
        <a class="ImagePreview" rel="<%#Eval("ImagePath")%>">
         
         <%--Bind Image Path in Image Control--%>
         <asp:Image ID="ImgGallery" runat="server" ImageUrl="<%#Bind('ImagePath')%>" ImageAlign="Middle" Width="150" Height="150" CssClass="ImagePreview" />
        
           <%-- Hidden Image control for caching the images--%>
         <img id="<%#Eval("ImagePath")%>" src="<%#Eval("ImagePath")%>" alt="" style="display:none"/>

        </a>
        
        <%--Bind Image Name in Label--%>
        <asp:Label ID="lblImageName" runat="server" Text='<%#Eval("ImageName")%>' style="color:Red"></asp:Label>

         </div>
    
      </asp:Panel>

      <%--Add Rounded Corner Extender to the Panel Control--%>
        <asp:RoundedCornersExtender ID="Pnl_RoundedCorner" runat="server" TargetControlID="PnlImages" Corners="All" Radius="15"></asp:RoundedCornersExtender>

 
   </ItemTemplate>
  </asp:DataList>

 </div>
 </form>
</body>
</html>


Step 15
Now Bind Image data in DataList Control,it's look like this
using System;
using System.Collections.Generic;
using System.Linq;
using System.Web;
using System.Web.UI;
using System.Web.UI.WebControls;

public partial class _Default : System.Web.UI.Page 
{
    protected void Page_Load(object sender, EventArgs e)
    {
        try
        {

            if (IsPostBack == false)
            {
                // Call Bind Image Data function on Page Load Event
                BindImageData();
            }

            
        }
        catch (Exception)
        { 
        }
    }

    #region Methods

    /// 
    ///  Bind Image Data into DataList Control
    /// 
    private void BindImageData()
    {
        try
        {
            // Store Data In List Object
           List<ImageEntity> ListObj = ImageView.GetImagesData();

            // Check the List Objetc is null or not
            if (ListObj != null)
            {
                // Check list Object count
                if (ListObj.Count > 0)
                {
                    // Bind Data in DataList Control
                    DataListImages.DataSource = ListObj;
                    DataListImages.DataBind();
                }
            }
        }
        catch (Exception ex)
        {
            throw new Exception(ex.Message); 
        }
    }

    #endregion
}


Run the Project.


Output


Click on Image for better view


Mouse Over Event


Download
Download Source Code

Sunday, October 16, 2011

Silverlight - Paging in DataGrid in Silverlight 4

In this article i will show you how to bind dynamic data to the DataGrid and how will implement data paging in DataGrid in Silverlight 4.


Step 1
Download Northwind database from the following link.
http://www.microsoft.com/downloads/details.aspx?FamilyID=06616212-0356-46a0-8da2-eebc53a68034&displaylang=en


Step 2
Attach a Northwind database into MS-SQL server.


Step 3

Download Silverlight 4 tools from the following link

Download Silverlight 4 toolkit from the following link
http://silverlight.codeplex.com/


Note : Select only April 2010 Toolkit Silverlight 4


Step 4
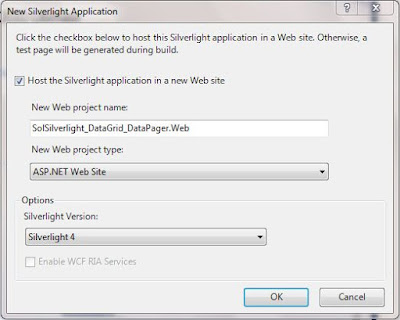
Create a Silverlight Application and give the solution name as SolSilverlight_DataGrid_DataPager.


Click on image for better view


Note: Select Web Project Type as ASP.NET Web site.


Step 5
In MainPage.xaml page, drag and drop DataGrid and DataPager in Grid and add respective DatagridTextColumns in DataGrid for binding data,it is look like this


Click on image for better view


<Grid x:Name="LayoutRoot" Background="White">
  <Grid.RowDefinitions>
   <RowDefinition Height="262*" />
   <RowDefinition Height="58*" />
  </Grid.RowDefinitions>
  <sdk:DataGrid x:Name="DgEmployee" Grid.Row="0" Grid.Column="0" AutoGenerateColumns="False" IsReadOnly="True" GridLinesVisibility="All" ItemsSource="{Binding}" >
   <sdk:DataGrid.Columns>
    <sdk:DataGridTextColumn Header="FirstName" Binding="{Binding FirstName}"/>
    <sdk:DataGridTextColumn Header="LastName" Binding="{Binding LastName}"/>
    <sdk:DataGridTextColumn Header="BirthDate" Binding="{Binding BirthDate}"/>
    <sdk:DataGridTextColumn Header="City" Binding="{Binding City}"/>
   </sdk:DataGrid.Columns>
  </sdk:DataGrid>
  
  <sdk:DataPager x:Name="DpEmployee" Grid.Row="1" Grid.Column="0" VerticalAlignment="Top" DisplayMode="FirstLastPreviousNextNumeric"  PageSize="3"/>
 </Grid>


Click on image for better view


Now Design part done.let's move to the Code behind part.


Step 6
Select a ASP.net Web Application (SolSilverlight_DataGrid_DataPager.WebAdd app_code folder in the solution and add a new folder inside the app_code folder and give folder name as ORD,it is look like this


Click on image for better view


Step 7
Add a Linq to Sql class,Select the ORD folder,right click on Add new Item,selectLINQ to SQL classes from installed Visual Studio templates and name it NorthwindDC and click on add button,it is look like this


Click on image for better view


Step 8
Open a O/R Designer by double click on NorthwindDC.dbml,it is look like this


Click on image for better view


Click on image for better view


Visual stdio provides an object-relational mapping designer,called the O/R Designer which allows you to visually design the object to database mapping.


Step 9

Create a Employee object.
In this example we have to work with employees table of the Northwind database,create a employee object that will use LINQ to SQL to map to this table.go to the server explorer,select northwind database,go to the tables and select Employees table,it is look like this


Click on image for better view


Drag and drop Employee table from Server explorer onto the design surface of the O/R Designer,it is look like this


Click on image for better view


Step 10
Select a ASP.net Web application (SolSilverlight_DataGrid_DataPager.Web) and add WCF Service,right click on solution,select Add New Item,select WCF Service from installed Visual Studio templates and name it EmployeeService.svc and click on add button.,it is look like this


It will add two .cs (named IEmployeeService.cs and EmployeeService.cs)


Click on image for better view


Step 11
Now we will make some modification to the OperationContract.Remove default DoWork method from the IEmployeeService interface.Add a new Method named as GetEmployeeData,it is look like this
using System;
using System.Collections.Generic;
using System.Linq;
using System.Runtime.Serialization;
using System.ServiceModel;
using System.Text;

// NOTE: You can use the "Rename" command on the "Refactor" menu to change the interface name "IEmployeeService" in both code and config file together.
[ServiceContract]
public interface IEmployeeService
{
    [OperationContract]
    List<ord.employee> GetEmployeeData();
}

Step 12
Implement IEmployeeService interface in EmployeeService class, retriving an employee data from database,it is look like this
using System;
using System.Collections.Generic;
using System.Linq;
using System.Runtime.Serialization;
using System.ServiceModel;
using System.Text;
using ORD;

// NOTE: You can use the "Rename" command on the "Refactor" menu to change the class name "EmployeeService" in code, svc and config file together.
public class EmployeeService : IEmployeeService
{
    /// 
    /// Get Employee Data From Northwind Database
    /// 
    /// List
    public List<Employee> GetEmployeeData()
    {
        try
        {
            ORD.NorthwindDCDataContext DC = new NorthwindDCDataContext(System.Configuration.ConfigurationManager.ConnectionStrings["NorthwindConnectionString"].ConnectionString.Trim());

            var Query = from Q in DC.Employees
                        select new ORD.Employee
                        {
                            FirstName = Q.FirstName,
                            LastName = Q.LastName,
                            BirthDate =Q.BirthDate,
                            City = Q.City
                        };

            return Query.ToList<ORD.Employee>();
        }
        catch (Exception ex)
        {
            throw new Exception(ex.Message); 
        }
    }
}


Step 13
Add a Service Reference of  WCF Service in silverlight application(SolSilverlight_DataGrid_DataPager).Right click the Silverlight project and add a Service reference,it is look like this


Click on image for better view


Step 14
Add a WCF service in the silverlight application.Add Service Reference dialog box will open and click on Discover button and give the namesapace name as EmployeeServiceReference.


Click on image for better view


Step 15
Get List of Employee Data from WCF Service and Bind to the DataGrid then Bind Item Source of the DataGrid to the DataPager control,it is look like this

using System;
using System.Collections.Generic;
using System.Linq;
using System.Net;
using System.Windows;
using System.Windows.Controls;
using System.Windows.Documents;
using System.Windows.Input;
using System.Windows.Media;
using System.Windows.Media.Animation;
using System.Windows.Shapes;

namespace SolSilverlight_DataGrid_DataPager
{
    public partial class MainPage : UserControl
    {
        public MainPage()
        {
            InitializeComponent();

            try
            {
                // Call Employee Service Method in Constructor
                CallEmployeeWCFService();
            }
            catch (Exception ex)
            {
                MessageBox.Show(ex.Message);
            }
        }


        #region Methods

        private void CallEmployeeWCFService()
        {
            try
            {
                // Call WCF Service
                EmployeeServiceReference.EmployeeServiceClient EmployeeServiceClientObj = new EmployeeServiceReference.EmployeeServiceClient();

                // Wire up the Async Completed  handler
               EmployeeServiceClientObj.GetEmployeeDataCompleted += new EventHandler<EmployeeServiceReference.GetEmployeeDataCompletedEventArgs>(EmployeeServiceClientObj_GetEmployeeDataCompleted);

                // Call WCF Method 
                EmployeeServiceClientObj.GetEmployeeDataAsync();
            }
            catch (Exception ex)
            {
                throw new Exception(ex.Message); 
            }
        }

        void EmployeeServiceClientObj_GetEmployeeDataCompleted(object sender, EmployeeServiceReference.GetEmployeeDataCompletedEventArgs e)
        {
            try
            {
                // Wrap list Employee to paged Collection view then bind to data grid
                DgEmployee.DataContext = new System.Windows.Data.PagedCollectionView(e.Result);

                // Bind item source of Employee DataGrid to the Data Pager Control
                DpEmployee.Source = DgEmployee.ItemsSource;
            }
            catch (Exception ex)
            {
                MessageBox.Show(ex.Message); 
            }
        }

        #endregion

    }


}


Run the Project.

Output


Click on image for better view


Full XAML Code
<UserControl
 xmlns="http://schemas.microsoft.com/winfx/2006/xaml/presentation"
 xmlns:x="http://schemas.microsoft.com/winfx/2006/xaml"
 xmlns:d="http://schemas.microsoft.com/expression/blend/2008"
 xmlns:mc="http://schemas.openxmlformats.org/markup-compatibility/2006"
 xmlns:sdk="http://schemas.microsoft.com/winfx/2006/xaml/presentation/sdk" x:Class="SolSilverlight_DataGrid_DataPager.MainPage"
 mc:Ignorable="d"
 d:DesignHeight="320" d:DesignWidth="630">

 <Grid x:Name="LayoutRoot" Background="White">
  <Grid.RowDefinitions>
   <RowDefinition Height="262*" />
   <RowDefinition Height="58*" />
  </Grid.RowDefinitions>
  <sdk:DataGrid x:Name="DgEmployee" Grid.Row="0" Grid.Column="0" AutoGenerateColumns="False" IsReadOnly="True" GridLinesVisibility="All" ItemsSource="{Binding}" >
   <sdk:DataGrid.Columns>
    <sdk:DataGridTextColumn Header="FirstName" Binding="{Binding FirstName}"/>
    <sdk:DataGridTextColumn Header="LastName" Binding="{Binding LastName}"/>
    <sdk:DataGridTextColumn Header="BirthDate" Binding="{Binding BirthDate}"/>
    <sdk:DataGridTextColumn Header="City" Binding="{Binding City}"/>
   </sdk:DataGrid.Columns>
  </sdk:DataGrid>
  
  <sdk:DataPager x:Name="DpEmployee" Grid.Row="1" Grid.Column="0" VerticalAlignment="Top" DisplayMode="FirstLastPreviousNextNumeric"  PageSize="3"/>
 </Grid>
</UserControl>


Download
Download Source Code