In this article i will show you how to create dynamic Simple Image Gallery in Window Phone 7 by using WrapPanel Control to layout Album thumbnails to the screen.
Step 1
To Develop application for Windows Phone 7 devices, you need to install Windows Phone 7.1 SDK and toolkit. You can download latest SDK for Windows Phone
http://www.microsoft.com/en-us/download/details.aspx?displaylang=en&id=27570
Silverlight for Window Phone Toolkit
http://silverlight.codeplex.com/releases/view/75888
Install SDK and Toolkit on your Machine.
Step 2
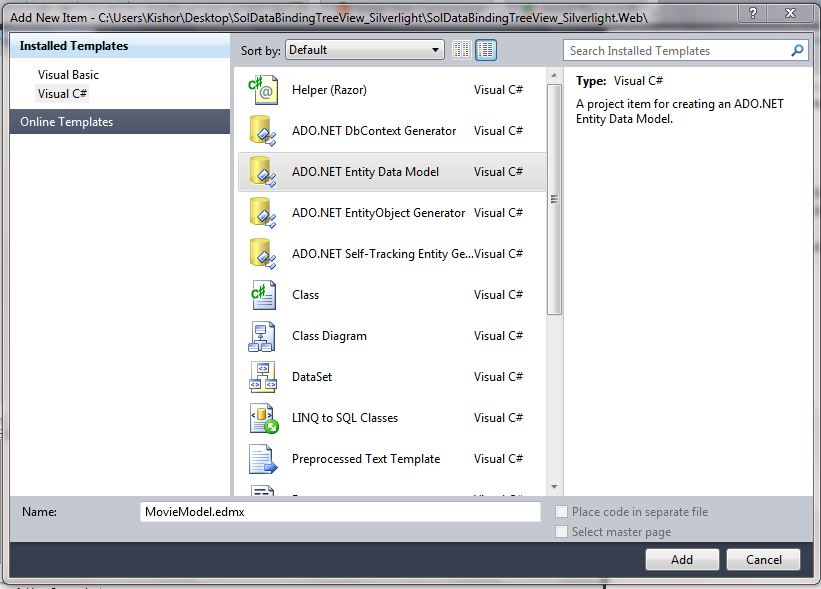
Create a Window Phone Application and give the solution name as SolImageGallery_WP7.
To start creating a new Windows Phone application, start Microsoft Visual Studio then create a new Project and select Windows Phone Application Template,it is look like this
Click on Image for better View
Step 3
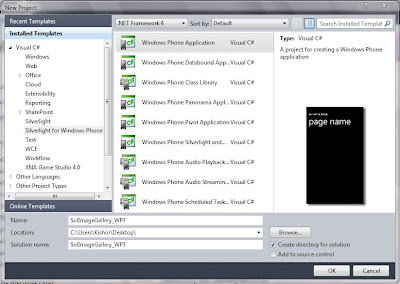
Select the Window Phone Platform,it is look like this

Click on Image for better View
Step 4
Adding Silverlight Window Phone Toolkit Reference.
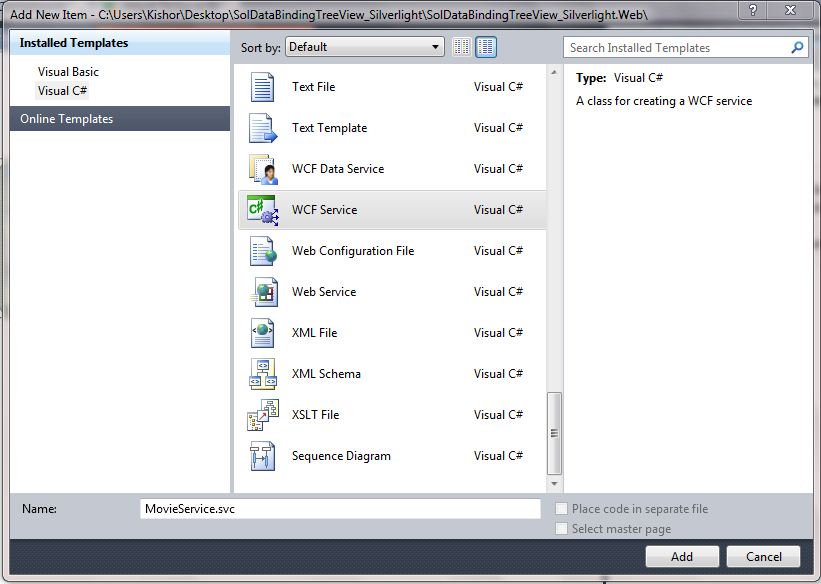
To add a reference, right click the References folder of your project in Solution Explorer and select Add Reference.On this dialog, Select Extensions in Assemblies,Select Microsoft.Phone.Controls.Toolkit,Click on Add Button,it is look like this

Click on Image for better View
Microsoft.Phone.Controls.Toolkit Path
C:\Program Files\Microsoft SDKs\Windows Phone\v7.1\Toolkit\Oct11\Bin\Microsoft.Phone.Controls.Toolkit.dll
Step 5
Add a System.Xml.Linq Assemble reference to the project.Right click on the project name in Solution Explorer, select Add Reference and Select System.Xml.Linq and select OK button,it is look like this

Click on Image for better View
Step 6
Save images in Folder,Create a New Folder in the Solution and give folder name as Images,it is look like this

Click on Image for better View
Step 7
Add XML file in the solution and give the file name as ImageData.xml,it is look like this

Click on Image for better View
Step 8
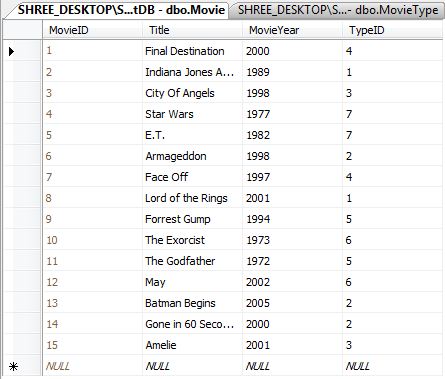
The XML in the following example defines an XML document with a root node called Images. This root node contains one or more nodes called Image that include elements called ImageName and ImagePath.
Step 9
Create an ImageEntity Class in the solution,it is look like this
Step 10
Create a ImageView static class in a solution for retrieving data from XML document.it is look like this
Step 11
Now design Image gallery on page.Drag and drop ListBox Control from Toolbox.it is look like this
Step 12
Add toolkit reference in XAML,so we can Add WrapPanel Control in Phone Application Page,it is look like this
Finally it's look like this
Step 13
Create a ItemPanelTemplate for ListBox Control in phone:PhoneApplicationPage.Resources to Display Images in WrapPanel Control,it is look like this
Step 14
Create a DataTemplate for ListBox Control in phone:PhoneApplicationPage.Resources to bind Image Path and Image Name in Image and TextBlock Control,it is look like this
Finally DataTemplate and ItemPanelTemplate look like this
Step 15
Apply DataTemplate and ItemPanelTemplate on ListBox Control,it is look like this
ItemSource Property - Gets or sets a collection used to generate the content of the ItemsControl.
ItemTemplate Property - Gets or sets the DataTemplate used to display each item.
ItemPanel Property - Gets or sets the template that defines the panel that controls the layout of items.
Step 16
Now Bind the data in ListBox Control in Code Behind,it is look like this
Run the project.
Output

Click on Image for better View
Full XAML Code
Download
Download Source Code
I had created a another Image gallery using LongListSelector in Window Phone 8.
http://kishor-naik-dotnet.blogspot.in/2013/11/wp8-longlistselector-in-window-phone-8.html

Step 1
To Develop application for Windows Phone 7 devices, you need to install Windows Phone 7.1 SDK and toolkit. You can download latest SDK for Windows Phone
http://www.microsoft.com/en-us/download/details.aspx?displaylang=en&id=27570
SDK 7.1.1 Update
https://dev.windowsphone.com/en-us/downloadsdkSilverlight for Window Phone Toolkit
http://silverlight.codeplex.com/releases/view/75888
Install SDK and Toolkit on your Machine.
Step 2
Create a Window Phone Application and give the solution name as SolImageGallery_WP7.
To start creating a new Windows Phone application, start Microsoft Visual Studio then create a new Project and select Windows Phone Application Template,it is look like this

Click on Image for better View
Step 3
Select the Window Phone Platform,it is look like this

Click on Image for better View
Step 4
Adding Silverlight Window Phone Toolkit Reference.
To add a reference, right click the References folder of your project in Solution Explorer and select Add Reference.On this dialog, Select Extensions in Assemblies,Select Microsoft.Phone.Controls.Toolkit,Click on Add Button,it is look like this

Click on Image for better View
Microsoft.Phone.Controls.Toolkit Path
C:\Program Files\Microsoft SDKs\Windows Phone\v7.1\Toolkit\Oct11\Bin\Microsoft.Phone.Controls.Toolkit.dll
Step 5
Add a System.Xml.Linq Assemble reference to the project.Right click on the project name in Solution Explorer, select Add Reference and Select System.Xml.Linq and select OK button,it is look like this

Click on Image for better View
Step 6
Save images in Folder,Create a New Folder in the Solution and give folder name as Images,it is look like this

Click on Image for better View
Step 7
Add XML file in the solution and give the file name as ImageData.xml,it is look like this

Click on Image for better View
Step 8
The XML in the following example defines an XML document with a root node called Images. This root node contains one or more nodes called Image that include elements called ImageName and ImagePath.
<?xml version="1.0" encoding="utf-8" ?>
<Images>

<Image>
  <ImageName>Gaara</ImageName>
  <ImagePath>../Images/Gaara.png</ImagePath>
  </Image>

  <Image>
    <ImageName>Choji</ImageName>
    <ImagePath>../Images/Choji.png</ImagePath>
  </Image>

  <Image>
    <ImageName>Jiraiya</ImageName>
    <ImagePath>../Images/Jiraiya.jpg</ImagePath>
  </Image>

  <Image>
    <ImageName>Kakashi</ImageName>
    <ImagePath>../Images/Kakashi.png</ImagePath>
  </Image>

<Image>
    <ImageName>Kiba</ImageName>
    <ImagePath>../Images/Kiba.png</ImagePath>
  </Image>
<Image>
  <ImageName>Naruto</ImageName>
    <ImagePath>../Images/Naruto.jpg</ImagePath>
  </Image>

<Image>
    <ImageName>Neji</ImageName>
    <ImagePath>../Images/Neji.jpg</ImagePath>
  </Image>

<Image>
    <ImageName>RockLee</ImageName>
    <ImagePath>../Images/RockLee.jpg</ImagePath>
  </Image>

<Image>
    <ImageName>Sai</ImageName>
    <ImagePath>../Images/Sai.jpg</ImagePath>
  </Image>

<Image>
    <ImageName>Shikamaru</ImageName>
    <ImagePath>../Images/Shikamaru.jpg</ImagePath>
  </Image>

<Image>
    <ImageName>Shino</ImageName>
    <ImagePath>../Images/Shino.jpg</ImagePath>
  </Image>

<Image>
    <ImageName>Yamato</ImageName>
    <ImagePath>../Images/Yamato.jpg</ImagePath>
  </Image>

</Images>
Step 9
Create an ImageEntity Class in the solution,it is look like this
using System;
using System.Net;
using System.Windows;
using System.Windows.Controls;
using System.Windows.Documents;
using System.Windows.Ink;
using System.Windows.Input;
using System.Windows.Media;
using System.Windows.Media.Animation;
using System.Windows.Shapes;

namespace SolImageGallery_WP7
{
    public class ImageEntity
    {
        #region proeprty

        /// <summary>
        /// Get And Set Image Name
        /// </summary>
        public String ImageName
        {
            get;
            set;
        }

        /// <summary>
        /// Get And Set Image Path
        /// </summary>
        public String ImagePath
        {
            get;
            set;
        }

        #endregion
    }
}
Step 10
Create a ImageView static class in a solution for retrieving data from XML document.it is look like this
using System;
using System.Net;
using System.Windows;
using System.Windows.Controls;
using System.Windows.Documents;
using System.Windows.Ink;
using System.Windows.Input;
using System.Windows.Media;
using System.Windows.Media.Animation;
using System.Windows.Shapes;
using System.Linq;
using System.Xml.Linq;
using System.Collections.Generic;

namespace SolImageGallery_WP7
{
    public static class ImageView
    {
       /// <summary>
        ///  Retrieve Data from XML Document
       /// </summary>
       /// <returns>List</returns>
       public static List<ImageEntity> GetDataFromXML()
        {
            try
            {
                // Load XML Document
                XDocument XDoc = XDocument.Load("ImageData.xml");

                //Query for retrieving all Images data from XML
                var Query = from Q in XDoc.Descendants("Image")
                            select new ImageEntity
                            {
                                ImageName=Q.Element("ImageName").Value,
                                ImagePath=Q.Element("ImagePath").Value
                            };

                // Reutn Data
                return Query.ToList<ImageEntity>();
            }
            catch (Exception ex)
            {
                throw new Exception(ex.Message);
            }
        }
    }
}
Step 11
Now design Image gallery on page.Drag and drop ListBox Control from Toolbox.it is look like this
<Grid x:Name="ContentPanel" Grid.Row="1" Margin="12,0,12,0">
         <ListBox x:Name="LstImageGallery" />
</Grid>
Step 12
Add toolkit reference in XAML,so we can Add WrapPanel Control in Phone Application Page,it is look like this
xmlns:toolkit="clr-namespace:Microsoft.Phone.Controls;assembly=Microsoft.Phone.Controls.Toolkit"
Finally it's look like this
<phone:PhoneApplicationPage
    xmlns="http://schemas.microsoft.com/winfx/2006/xaml/presentation"
    xmlns:x="http://schemas.microsoft.com/winfx/2006/xaml"
    xmlns:phone="clr-namespace:Microsoft.Phone.Controls;assembly=Microsoft.Phone"
    xmlns:shell="clr-namespace:Microsoft.Phone.Shell;assembly=Microsoft.Phone"
    xmlns:d="http://schemas.microsoft.com/expression/blend/2008"
    xmlns:mc="http://schemas.openxmlformats.org/markup-compatibility/2006"
    xmlns:toolkit="clr-namespace:Microsoft.Phone.Controls;assembly=Microsoft.Phone.Controls.Toolkit"
    xmlns:ec="clr-namespace:Microsoft.Expression.Interactivity.Core;assembly=Microsoft.Expression.Interactions"
    x:Class="SolImageGallery_WP7.MainPage"
    mc:Ignorable="d" d:DesignWidth="480" d:DesignHeight="768"
    SupportedOrientations="Portrait" Orientation="Portrait"
    shell:SystemTray.IsVisible="True" Loaded="PhoneApplicationPage_Loaded">
Step 13
Create a ItemPanelTemplate for ListBox Control in phone:PhoneApplicationPage.Resources to Display Images in WrapPanel Control,it is look like this
<ItemsPanelTemplate x:Key="ListItemsPanelTemplate">
   <toolkit:WrapPanel ItemWidth="150" ItemHeight="150" HorizontalAlignment="Center" VerticalAlignment="Center"/>
</ItemsPanelTemplate>
Step 14
Create a DataTemplate for ListBox Control in phone:PhoneApplicationPage.Resources to bind Image Path and Image Name in Image and TextBlock Control,it is look like this
<DataTemplate x:Key="ListDataTemplate">
   <StackPanel Orientation="Vertical" HorizontalAlignment="Center" VerticalAlignment="Center">

    <Border BorderBrush="#FFFF9800" BorderThickness="3"  Width="120" Height="120"  CornerRadius="10">
     <Image x:Name="image" Source="{Binding ImagePath}" Width="100" Height="100" HorizontalAlignment="Center" VerticalAlignment="Center" Stretch="Fill"/>
    </Border>

    <TextBlock Text="{Binding ImageName}" Style="{StaticResource PhoneTextSubtleStyle}" HorizontalAlignment="Center" VerticalAlignment="Center"/>

   </StackPanel>
</DataTemplate>
Finally DataTemplate and ItemPanelTemplate look like this
<phone:PhoneApplicationPage.Resources>

  <ItemsPanelTemplate x:Key="ListItemsPanelTemplate">
   <toolkit:WrapPanel ItemWidth="150" ItemHeight="150" HorizontalAlignment="Center" VerticalAlignment="Center"/>
  </ItemsPanelTemplate>

  <DataTemplate x:Key="ListDataTemplate">
   <StackPanel Orientation="Vertical" HorizontalAlignment="Center" VerticalAlignment="Center">

    <Border BorderBrush="#FFFF9800" BorderThickness="3"  Width="120" Height="120"  CornerRadius="10">
     <Image x:Name="image" Source="{Binding ImagePath}" Width="100" Height="100" HorizontalAlignment="Center" VerticalAlignment="Center" Stretch="Fill"/>
    </Border>

    <TextBlock Text="{Binding ImageName}" Style="{StaticResource PhoneTextSubtleStyle}" HorizontalAlignment="Center" VerticalAlignment="Center"/>

   </StackPanel>
  </DataTemplate>
</phone:PhoneApplicationPage.Resources>
Step 15
Apply DataTemplate and ItemPanelTemplate on ListBox Control,it is look like this
<Grid x:Name="ContentPanel" Grid.Row="1" Margin="12,0,12,0">
         <ListBox x:Name="LstImageGallery" ItemsSource="{Binding}" ItemsPanel="{StaticResource ListItemsPanelTemplate}" ItemTemplate="{StaticResource ListDataTemplate}"/>
</Grid>
ItemSource Property - Gets or sets a collection used to generate the content of the ItemsControl.
ItemTemplate Property - Gets or sets the DataTemplate used to display each item.
ItemPanel Property - Gets or sets the template that defines the panel that controls the layout of items.
Step 16
Now Bind the data in ListBox Control in Code Behind,it is look like this
using System;
using System.Collections.Generic;
using System.Linq;
using System.Net;
using System.Windows;
using System.Windows.Controls;
using System.Windows.Documents;
using System.Windows.Input;
using System.Windows.Media;
using System.Windows.Media.Animation;
using System.Windows.Shapes;
using Microsoft.Phone.Controls;


namespace SolImageGallery_WP7
{
    public partial class MainPage : PhoneApplicationPage
    {
        // Constructor
        public MainPage()
        {
            InitializeComponent();


        }

        private void PhoneApplicationPage_Loaded(object sender, RoutedEventArgs e)
        {
            try
            {
                BindImages(); // Call Bind Images Function in Application Page Load Event
            }
            catch (Exception ex)
            {
                MessageBox.Show(ex.Message);
            }
        }

        #region Methods
        /// <summary>
        /// Bind Image in List Box Control
        /// </summary>
        public void BindImages()
        {
            try
            {
                // Store Data in List Object
                List<ImageEntity> ListImages = ImageView.GetDataFromXML();

                // Check List Object is Null or Not
                if (ListImages != null)
                {
                    // Check List Object Count
                    if (ListImages.Count > 0)
                    {
                        // Bind Data in List Box Control.
                        LstImageGallery.DataContext = ListImages;
                    }
                }
            }
            catch (Exception ex)
            {
                throw new Exception(ex.Message);
            }
        }

        #endregion
    }
}
Run the project.
Output
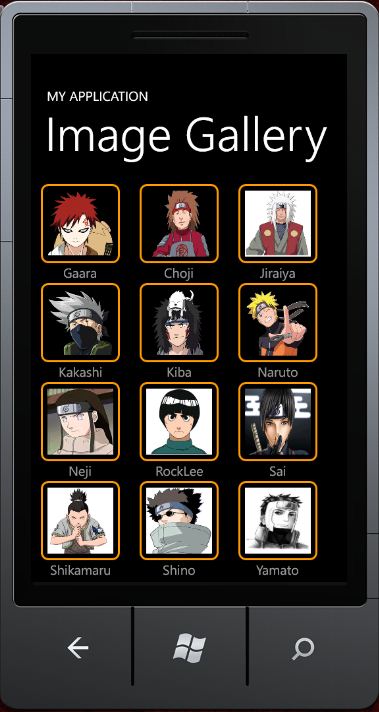
Click on Image for better View
Full XAML Code
<phone:PhoneApplicationPage
    xmlns="http://schemas.microsoft.com/winfx/2006/xaml/presentation"
    xmlns:x="http://schemas.microsoft.com/winfx/2006/xaml"
    xmlns:phone="clr-namespace:Microsoft.Phone.Controls;assembly=Microsoft.Phone"
    xmlns:shell="clr-namespace:Microsoft.Phone.Shell;assembly=Microsoft.Phone"
    xmlns:d="http://schemas.microsoft.com/expression/blend/2008"
    xmlns:mc="http://schemas.openxmlformats.org/markup-compatibility/2006"
    xmlns:toolkit="clr-namespace:Microsoft.Phone.Controls;assembly=Microsoft.Phone.Controls.Toolkit"
    xmlns:ec="clr-namespace:Microsoft.Expression.Interactivity.Core;assembly=Microsoft.Expression.Interactions"
    x:Class="SolImageGallery_WP7.MainPage"
    mc:Ignorable="d" d:DesignWidth="480" d:DesignHeight="768"
    SupportedOrientations="Portrait" Orientation="Portrait"
    shell:SystemTray.IsVisible="True" Loaded="PhoneApplicationPage_Loaded">

 <phone:PhoneApplicationPage.Resources>

  <ItemsPanelTemplate x:Key="ListItemsPanelTemplate">
   <toolkit:WrapPanel ItemWidth="150" ItemHeight="150" HorizontalAlignment="Center" VerticalAlignment="Center"/>
  </ItemsPanelTemplate>

  <DataTemplate x:Key="ListDataTemplate">
   <StackPanel Orientation="Vertical" HorizontalAlignment="Center" VerticalAlignment="Center">

    <Border BorderBrush="#FFFF9800" BorderThickness="3"  Width="120" Height="120"  CornerRadius="10">
     <Image x:Name="image" Source="{Binding ImagePath}" Width="100" Height="100" HorizontalAlignment="Center" VerticalAlignment="Center" Stretch="Fill"/>
    </Border>

    <TextBlock Text="{Binding ImageName}" Style="{StaticResource PhoneTextSubtleStyle}" HorizontalAlignment="Center" VerticalAlignment="Center"/>

   </StackPanel>
  </DataTemplate>
 </phone:PhoneApplicationPage.Resources>

    <!--Sample code showing usage of ApplicationBar-->
    <!--<phone:PhoneApplicationPage.ApplicationBar>
        <shell:ApplicationBar IsVisible="True" IsMenuEnabled="True">
            <shell:ApplicationBarIconButton IconUri="/Images/appbar_button1.png" Text="Button 1"/>
            <shell:ApplicationBarIconButton IconUri="/Images/appbar_button2.png" Text="Button 2"/>
            <shell:ApplicationBar.MenuItems>
                <shell:ApplicationBarMenuItem Text="MenuItem 1"/>
                <shell:ApplicationBarMenuItem Text="MenuItem 2"/>
            </shell:ApplicationBar.MenuItems>
        </shell:ApplicationBar>
    </phone:PhoneApplicationPage.ApplicationBar>-->

    <!--LayoutRoot is the root grid where all page content is placed-->
    <Grid x:Name="LayoutRoot" Background="Transparent">
        <Grid.RowDefinitions>
            <RowDefinition Height="Auto"/>
            <RowDefinition Height="*"/>
        </Grid.RowDefinitions>

        <!--TitlePanel contains the name of the application and page title-->
        <StackPanel x:Name="TitlePanel" Grid.Row="0" Margin="12,17,0,28">
            <TextBlock x:Name="ApplicationTitle" Text="MY APPLICATION" Style="{StaticResource PhoneTextNormalStyle}"/>
            <TextBlock x:Name="PageTitle" Text="Image Gallery" Margin="9,-7,0,0" Style="{StaticResource PhoneTextTitle1Style}"/>
        </StackPanel>

        <!--ContentPanel - place additional content here-->
        <Grid x:Name="ContentPanel" Grid.Row="1" Margin="12,0,12,0">
         <ListBox x:Name="LstImageGallery" ItemsSource="{Binding}" ItemsPanel="{StaticResource ListItemsPanelTemplate}" ItemTemplate="{StaticResource ListDataTemplate}"/>
  </Grid>
    </Grid>

</phone:PhoneApplicationPage>
Download
Download Source Code
I had created a another Image gallery using LongListSelector in Window Phone 8.
http://kishor-naik-dotnet.blogspot.in/2013/11/wp8-longlistselector-in-window-phone-8.html