Tuesday, July 16, 2013

MS-SQL - Merge Statement in MS SQL Server

MERGE statement is one of the interesting T-Sql enhancements of Sql Server 2008. With Merge statement we can very efficiently perform multiple DML operations like INSERT, UPDATE and DELETE on the target table data based on Source table data.

The MERGE statement basically works as separate insert, update, and delete statements all within the same statement. You specify a Source record set and a Target table, and the join between the two. You then specify the type of data modification that is to occur when the records between the two data are matched or are not matched. MERGE is very useful, especially when it comes to loading data warehouse tables, which can be very large and require specific actions to be taken when rows are or are not present.

In short we can say that we need to sync with tables with latest information.


In the below example we are updating the data from source table data to target table. For this we have written MERGE statement, that is performing INSERT, UPDATE & DELETE with a single MERGE statement
MERGE statement performing below operations 
  • Insert
    • If EmployeeID not matched in target table inserting row from source table to target table
  • Update
    • If EmployeeID matched then updating first name,last name and city in target table from source table.
  • Delete
    • If EmployeeID in target table not matched with source table, deleting row from target table

 Important points to remember while using the MERGE statement are:

  • The merge statement must be terminated by a semicolon otherwise an error will occur.
  • When there is a MATCH clause used along with some condition, it must be specified first amongst all other WHEN MATCH clauses.

Let see how to use Merge statement in SQL Server.

Step 1
First Create Source Table with sample Data it is look like this
-- Create Source Employee Table
CREATE TABLE SourceEmployee
(
 EmployeeID NUmeric(18,0) IDENTITY(1,1) PRIMARY KEY,
 FirstName Nvarchar(50),
 LastName Nvarchar(50),
 City Nvarchar(50)
)
-- Insert Record in Source Employee
INSERT INTO SourceEmployee
(FirstName,LastName,City)
VALUES
('Ashok','Patil','Mumbai')

INSERT INTO SourceEmployee
(FirstName,LastName,City)
VALUES
('Ajay','Patil','Mumbai')

INSERT INTO SourceEmployee
(FirstName,LastName,City)
VALUES
('Sam','Patil','Mumbai')

SELECT * FROM SourceEmployee


Click on Image for better view

Step 2
Now Create Target Table with sample Data it is look like this
-- Create Target Employee Table 
CREATE TABLE TargetEmployee
(
 EmployeeID NUmeric(18,0) IDENTITY(1,1) PRIMARY KEY,
 FirstName Nvarchar(50),
 LastName Nvarchar(50),
 City Nvarchar(50)
)

-- Insert Record in Target Employee

INSERT INTO TargetEmployee
(FirstName,LastName,City)
VALUES
('Ashok','Patil','Mumbai')

INSERT INTO TargetEmployee
(FirstName,LastName,City)
VALUES
('Ajay','Patil','Mumbai')

SELECT * FROM TargetEmployee


Click on Image for better view

Step 3
Now Use Merge Statement,it is look like this
-- Sync table using Merge statement
MERGE TargetEmployee as Target
USING SourceEmployee as Source
ON Target.EmployeeID=Source.EmployeeID
WHEN MATCHED THEN
 UPDATE 
  SET Target.FirstName=Source.FirstName,
   Target.LastName=Source.LastName,
   Target.City=source.City
WHEN NOT MATCHED BY TARGET THEN
  INSERT (FirstName,Lastname,City)
  VALUES (Source.FirstName,Source.LastName,Source.City)
WHEN NOT MATCHED BY SOURCE THEN
DELETE

OUTPUT $action,Inserted.*,Deleted.*;


Output

Click on Image for better view

SQLfiddle Output


Download
Download Script

Monday, July 15, 2013

WP7 - Store XML file in Isolated Storage in Window Phone 7

Isolated Storage is not a new concept.  It’s been used in Silverlight since version 2.  It’s basically a way to store data or files on the local file system.  It’s “isolated” because only your application has access to the data.  If you have two applications, and you want to share data between them, you’d better have some kind of cloud-based service that can share that data for you.  Applications will not have the ability to share, call, or interact with other applications on the device.

I will show how to perform CURD operation on XML file in Window Phone 7.

Step 1
To Develop application for Windows Phone 7 devices, you need to install Windows Phone 7.1 SDK and toolkit. You can download latest SDK for Windows Phone
http://www.microsoft.com/en-us/download/details.aspx?displaylang=en&id=27570

Step 2
SDK 7.1.1 Update
https://dev.windowsphone.com/en-us/downloadsdk

Step 3
Silverlight for Window Phone Toolkit
http://silverlight.codeplex.com/releases/view/75888

Install SDK and Toolkit on your Machine.

Step 4
Create a Window Phone Application and give the solution name as SolXML_WP7.
To start creating a new Windows Phone application, start Microsoft Visual Studio then create a new Project and select Windows Phone Application Template,it is look like this


Click on Image for better View


Step 5
Select the Window Phone Platform,it is look like this


Click on Image for better View

Step 6
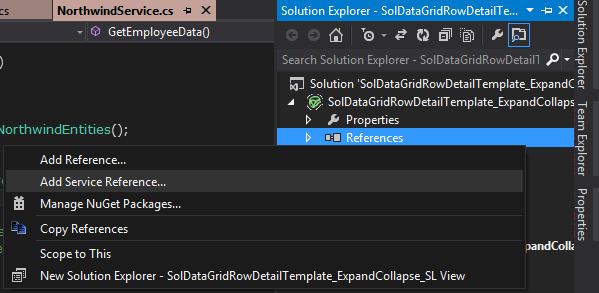
Add a System.Xml.Linq Assemble reference to the project.Right click on the project name in Solution Explorer, select Add Reference and Select System.Xml.Linq  and select OK button,it is look like this


Click on Image for better View

Step 7
First create Employee Entity class and Implement INotifyPropertyChanged Interface in Solution,it is look like this
using System;
using System.Net;
using System.Windows;
using System.Windows.Controls;
using System.Windows.Documents;
using System.Windows.Ink;
using System.Windows.Input;
using System.Windows.Media;
using System.Windows.Media.Animation;
using System.Windows.Shapes;
using System.ComponentModel;

namespace SolXML_WP7
{
    public class Employee:INotifyPropertyChanged
    {
        #region Field

        private String _FirstName;
        private String _LastName;
        private String _City;
        private String _ID;

        #endregion

        #region Property

        public String FirstName
        {
            get
            {
                return _FirstName;
            }
            set
            {
                _FirstName = value;
                OnPropertyChanged("FirstName");
            }
        }

        public String LastName
        {
            get
            {
                return _LastName;
            }
            set
            {
                _LastName = value;
                OnPropertyChanged("LastName");
            }
        }

        public String City
        {
            get
            {
                return _City;
            }
            set
            {
                _City = value;
                OnPropertyChanged("City");
            }
        }

        public String ID
        {
            get
            {
                return _ID;
            }
            set
            {
                _ID = value;
                OnPropertyChanged("ID");
            }
        }

        #endregion

        public event PropertyChangedEventHandler PropertyChanged;

        public void OnPropertyChanged(String Name)
        {
            if (PropertyChanged != null)
            {
                PropertyChanged(this, new PropertyChangedEventArgs(Name));
            }
        }
    }
}

The INotifyPropertyChanged interface is used to notify clients, typically binding clients, that a property value has changed.

For example, consider a Employee object with a property called FirstName. To provide generic property-change notification, the Employee type implements the INotifyPropertyChanged interface and raises a PropertyChanged event when FirstName is changed.

Step 8
Create a EmployeeOperation class to perform CURD Operation on XML file,it is look like this
using System;
using System.Net;
using System.Windows;
using System.Windows.Controls;
using System.Windows.Documents;
using System.Windows.Ink;
using System.Windows.Input;
using System.Windows.Media;
using System.Windows.Media.Animation;
using System.Windows.Shapes;
using System.Linq;
using System.Xml;
using System.Xml.Linq;
using System.IO.IsolatedStorage;
using System.IO;
using System.Collections.Generic;

namespace SolXML_WP7
{
    public static class EmployeeOperation
    {
       
        #region Method
        /// <summary>
        /// Get Data from XML File
        /// </summary>
        /// <returns>List</returns>
        public static List<Employee> GetEmployeeData()
        {
            List<Employee> ListEmployeeObj = null;
            try
            {
                // Represent an Isolated are where containing Files and Folders
                using (IsolatedStorageFile ISFObj = IsolatedStorageFile.GetUserStoreForApplication())
                {
                    // Check the given XML file is Exists or not
                    if (ISFObj.FileExists("Employee.xml"))
                    {
                        // Create a instance of IsolatedStorageFileStream Class to access the File by given path
                        IsolatedStorageFileStream ISFStreamObj = new IsolatedStorageFileStream("Employee.xml", FileMode.Open, FileAccess.Read, ISFObj);
                        // Load XML File
                        XDocument XDocObj = XDocument.Load(ISFStreamObj);
                        // Once the File Load in XDocument Class then Release IsolatedStorageFileStream Object.
                        ISFStreamObj.Close();
                        
                        // Read Data from XML Document
                        // Using Linq Query
                        //var Query =( from Q in doc.Descendants("Employee")
                        //            select new Employee()
                        //            {
                        //                ID = Q.Element("ID").Value,
                        //                FirstName = Q.Element("FirstName").Value,
                        //                LastName = Q.Element("LastName").Value,
                        //                City = Q.Element("Last").Value
                        //            }).ToList<Employee>();

                        // Using Lambda Expression
                        var Query = XDocObj.Descendants("Employee").Select(LE => new Employee()
                        {
                            ID = LE.Element("ID").Value,
                            FirstName = LE.Element("FirstName").Value,
                            LastName = LE.Element("LastName").Value,
                            City = LE.Element("City").Value
                        }).ToList<Employee>();

                        ListEmployeeObj= Query;
                    }
                }
            }
            catch (Exception ex)
            {
                throw new Exception(ex.Message);
            }

            return ListEmployeeObj;
        }

        /// <summary>
        /// Save And Update Record 
        /// </summary>
        /// <param name="EmployeeObj">Specify the Employee Object</param>
        /// <returns>Boolean</returns>
        public static Boolean SaveUpdate(Employee EmployeeObj)
        {
            Boolean Flag = false;
            try
            {
                // Represent an Isolated are where containing Files and Folders
                using (IsolatedStorageFile ISFObj = IsolatedStorageFile.GetUserStoreForApplication())
                {
                    XDocument XDocObj = null; ;
                    IsolatedStorageFileStream ISFStreamObj = null;
                    // Check the File Exist or Not
                    if (!ISFObj.FileExists("Employee.xml"))
                    {
                        //Create new fresh document and Insert First Data (First time)
                        ISFStreamObj = new IsolatedStorageFileStream("Employee.xml", FileMode.Create, ISFObj);
                        XDocObj = new XDocument(new XDeclaration("1.0", "utf-8", "yes"),
                        new XElement("Data",
                            new XElement("Employee",
                                    new XElement("ID", Guid.NewGuid().ToString()),
                                    new XElement("FirstName", EmployeeObj.FirstName),
                                    new XElement("LastName", EmployeeObj.LastName),
                                    new XElement("City", EmployeeObj.City)
                                )));

                        XDocObj.Save(ISFStreamObj);
                        ISFStreamObj.Close();

                        Flag = true;
                    }
                    else
                    {
                        // Modify Or Append New Record
                        ISFStreamObj = new IsolatedStorageFileStream("Employee.xml", FileMode.Open, FileAccess.Read, ISFObj);
                        XDocObj = XDocument.Load(ISFStreamObj);
                        ISFStreamObj.Close();

                        var Query = from Q in XDocObj.Descendants("Employee")
                                    where Q.Element("ID").Value == EmployeeObj.ID
                                    select Q;

                        if (Query.Count() > 0)
                        {
                            // Update Record
                            foreach (XElement X in Query)
                            {
                                X.SetElementValue("FirstName", EmployeeObj.FirstName);
                                X.SetElementValue("LastName", EmployeeObj.LastName);
                                X.SetElementValue("City", EmployeeObj.City);

                            }

                            ISFStreamObj = new IsolatedStorageFileStream("Employee.xml", FileMode.Create, FileAccess.Write, ISFObj);
                            XDocObj.Save(ISFStreamObj);
                            ISFStreamObj.Close();
                            Flag = true;
                        }
                        else
                        {
                            // Append New Record
                            XDocObj.Element("Data").Add(new XElement("Employee",
                                     new XElement("ID", Guid.NewGuid().ToString()),
                                     new XElement("FirstName", EmployeeObj.FirstName),
                                     new XElement("LastName", EmployeeObj.LastName),
                                     new XElement("City", EmployeeObj.City)));

                            ISFStreamObj = new IsolatedStorageFileStream("Employee.xml", FileMode.Create, FileAccess.Write, ISFObj);
                            XDocObj.Save(ISFStreamObj);
                            ISFStreamObj.Close();

                            Flag = true;
                        }
                    }
                }
            }
            catch (Exception ex)
            {
                throw new Exception(ex.Message);
            }

            return Flag;
        }

        /// <summary>
        /// Delete Data from XML File
        /// </summary>
        /// <param name="EmployeeObj">Specify the Employee Object</param>
        /// <returns>Boolean</returns>
        public static Boolean Delete(Employee EmployeeObj)
        {
            Boolean Flag = false;
            IsolatedStorageFileStream ISFStreamObj=null;
            XDocument XDocObj=null;
            try
            {
                // Represent an Isolated are where containing Files and Folders
                using (IsolatedStorageFile ISFObj = IsolatedStorageFile.GetUserStoreForApplication())
                {
                    // Create a instance of IsolatedStorageFileStream Class to access the File by given path
                    ISFStreamObj = new IsolatedStorageFileStream("Employee.xml", FileMode.Open, FileAccess.Read, ISFObj);
                    // Load XML File
                    XDocObj = XDocument.Load(ISFStreamObj);
                    // Once the File Load in XDocument Class then Release IsolatedStorageFileStream Object.
                    ISFStreamObj.Close();

                    // Get Data from Using Linq Query
                    var Query = from Q in XDocObj.Descendants("Employee")
                                where Q.Element("ID").Value == EmployeeObj.ID
                                select Q;

                    // Check the Count is greather than equal to 1
                    if (Query.Count() >= 1)
                    {
                        // Remove Data from XML File
                        Query.Remove();

                        // Save the Document.
                        ISFStreamObj = new IsolatedStorageFileStream("Employee.xml", FileMode.Create, FileAccess.Write, ISFObj);
                        XDocObj.Save(ISFStreamObj);
                        ISFStreamObj.Close();
                        Flag = true;
                    }
                }
            }
            catch (Exception ex)
            {
                throw new Exception(ex.Message); 
            }

            return Flag;
        }
        #endregion
    }
}

IsolatedStorageFile
System.IO.IsolatedStorage.IsolatedStorageFile represents an isolated storage area containing files and directories. Since standard Silverlight also provides such support, we only need to care about the changes in Windows Phone Isolated Storage APIs from Silverlight, as follows:

  • Remove GetUserStoreForSite
  • Quota APIs will reflect that there is no quota.
  • Windows Phone applications will not have a limit on the quota for storage on disk.
  • Windows Phone applications will only have application storage. Since the application cannot have a site of origin, the site specific storage APIs will not be available to Windows Phone applications.
IsolatedFileStream
In Windows desktop-styled applications, System.IO.FileStream plays an important role between the disk file and related memory site. Similarly, in Windows Phone 7 System.IO.IsolatedStorage.IsolatedFileStream can expose a file stream access to a file stored within isolated storage. You can use this class to read, write and create files in isolated storage. Since this class extends FileStream, you can use an instance of IsolatedStorageFileStream in most situations where a FileStream might otherwise be used, such as to construct a StreamReader or StreamWriter.

Step 9
Now create a SessionManager static class in solution.SessionManger class enables you to store and retrieve values for a user as the user navigates pages in a Window Phone Application.it is like ASP.net session State Management.
using System;
using System.Collections.Generic;
using System.Linq;
using System.Text;

namespace SolXML_WP7
{
    public static class SessionManger
    {
        #region Declaration

        private static Dictionary<String, Object> DicObj = new Dictionary<string, object>();

        #endregion

        #region Property

        /// <summary>
        /// Get and Set Session State
        /// </summary>
        public static Dictionary<String, Object> Session
        {
            get
            {
                return DicObj;
            }
            set
            {
                DicObj = value;
            }
        }

        /// <summary>
        /// Get the count Session State
        /// </summary>
        public static long Count
        {
            get
            {
                return DicObj.Count;
            }
        }

        #endregion

        #region Methods

        /// <summary>
        /// Add Value in Session State
        /// </summary>
        /// <typeparam name="T">Specify the Type</typeparam>
        /// <param name="Key">Specify the Key Name</param>
        /// <param name="TValue">Specify the value which we passed type</param>
        public static void Add<T>(String Key, T TValue)
        {
            try
            {
                DicObj.Add(Key, TValue);
            }
            catch (Exception ex)
            {
                throw new Exception(ex.Message);
            }
        }

        /// <summary>
        /// Read Data from Session which specified Key
        /// </summary>
        /// <typeparam name="T">Specify the Type</typeparam>
        /// <param name="Key">Specify the Key Name</param>
        /// <returns>T</returns>
        public static T Read<T>(String Key)
        {
            T TValue = default(T);

            try
            {
                TValue = (T)DicObj[Key];
            }
            catch (Exception ex)
            {
                throw new Exception(ex.Message);
            }

            return TValue;
        }

        /// <summary>
        /// Remove an Item from Session which specified Key Name
        /// </summary>
        /// <param name="Key">Specify the Key Name</param>
        public static void Remove(String Key)
        {
            try
            {
                int Count = DicObj.Where(LE => LE.Key == Key).Count();
                if (Count >= 1)
                {
                    DicObj.Remove(Key);
                }
                else
                {
                    throw new Exception("No Key Found");
                }

            }
            catch (Exception ex)
            {
                throw new Exception(ex.Message);
            }
        }

        /// <summary>
        /// Remove All Keys and Values
        /// </summary>
        public static void RemoveAll()
        {
            try
            {
                DicObj.Clear();
            }
            catch (Exception ex)
            {
                throw new Exception(ex.Message);
            }
        }

        #endregion
    }
}

Important Note for Window Phone Developer.
In Window Phone 7 its already have page state management.it is inbuilt in SDK. I write this above code to improve the usability.
So question is that how can we use Actual page state management in Window Phone 7.so here is following Code. 
Microsoft.Phone.Shell.PhoneApplicationService.Current.State["Value"] = "Yogesh Naik";

this.NavigationService.Navigate(new Uri("/MainPage2.xaml",UriKind.Relative));

Now to get value from another Page.
String GetValue=PhoneApplicationService.Current.State["Value"] as String;

The choice is yours which concept do you want to use in Project.


Step 10
Now a create  a sample page,it is look like this
<phone:PhoneApplicationPage 
    x:Class="SolXML_WP7.MainPage"
    xmlns="http://schemas.microsoft.com/winfx/2006/xaml/presentation"
    xmlns:x="http://schemas.microsoft.com/winfx/2006/xaml"
    xmlns:phone="clr-namespace:Microsoft.Phone.Controls;assembly=Microsoft.Phone"
    xmlns:shell="clr-namespace:Microsoft.Phone.Shell;assembly=Microsoft.Phone"
    xmlns:d="http://schemas.microsoft.com/expression/blend/2008"
    xmlns:mc="http://schemas.openxmlformats.org/markup-compatibility/2006"
    mc:Ignorable="d" d:DesignWidth="480" d:DesignHeight="768"
    FontFamily="{StaticResource PhoneFontFamilyNormal}"
    FontSize="{StaticResource PhoneFontSizeNormal}"
    Foreground="{StaticResource PhoneForegroundBrush}"
    SupportedOrientations="Portrait" Orientation="Portrait"
    shell:SystemTray.IsVisible="True">


    <!--LayoutRoot is the root grid where all page content is placed-->
    <Grid x:Name="LayoutRoot" Background="Transparent">
        <Grid.RowDefinitions>
            <RowDefinition Height="Auto"/>
            <RowDefinition Height="*"/>
        </Grid.RowDefinitions>

        <!--TitlePanel contains the name of the application and page title-->
        <StackPanel x:Name="TitlePanel" Grid.Row="0" Margin="12,17,0,28">
            <TextBlock x:Name="ApplicationTitle" Text="Isolated Storage" Style="{StaticResource PhoneTextNormalStyle}"/>
            <TextBlock x:Name="PageTitle" Text="XML" Margin="9,-7,0,0" Style="{StaticResource PhoneTextTitle1Style}"/>
        </StackPanel>

        <!--ContentPanel - place additional content here-->
        <Grid x:Name="ContentPanel" Grid.Row="1" Margin="12,0,12,0">
            <Grid.RowDefinitions>
                <RowDefinition Height="80*" />
                <RowDefinition Height="50*" />
                <RowDefinition Height="70*" />
                <RowDefinition Height="50*" />
                <RowDefinition Height="70*" />
                <RowDefinition Height="50*" />
                <RowDefinition Height="70*" />
                <RowDefinition Height="172*" />
            </Grid.RowDefinitions>
            
            <StackPanel Grid.Row="0" Grid.Column="0" Orientation="Horizontal" HorizontalAlignment="Right">
                <Button x:Name="btnSubmit" Grid.Row="6" Grid.Column="0" Width="80">
                    <Button.Background>
                        <ImageBrush ImageSource="save.png" Stretch="Fill"/>
                    </Button.Background>
                </Button>
                <Button x:Name="btnView" Grid.Row="6" Grid.Column="0" Width="80">
                    <Button.Background>
                        <ImageBrush ImageSource="play.png" Stretch="Fill"/>
                    </Button.Background>
                </Button>
            </StackPanel>
            
            <TextBlock Grid.Row="1" Grid.Column="0" Text="First Name" HorizontalAlignment="Left" VerticalAlignment="Center" Margin="12,0,0,0"></TextBlock>
            <TextBox x:Name="txtFirstName" Grid.Row="2" Text="{Binding FirstName,Mode=TwoWay}"></TextBox>

            <TextBlock Grid.Row="3" Grid.Column="0" Text="Last Name" HorizontalAlignment="Left" VerticalAlignment="Center" Margin="12,0,0,0"></TextBlock>
            <TextBox x:Name="txtLastName" Grid.Row="4"  Text="{Binding LastName,Mode=TwoWay}"></TextBox>

            <TextBlock Grid.Row="5" Grid.Column="0" Text="City" HorizontalAlignment="Left" VerticalAlignment="Center" Margin="12,0,0,0"></TextBlock>
            <TextBox x:Name="txtCity" Grid.Row="6" Text="{Binding City, Mode=TwoWay}"></TextBox>
           
        </Grid>
    </Grid>
 
    <!--Sample code showing usage of ApplicationBar-->
    <!--<phone:PhoneApplicationPage.ApplicationBar>
        <shell:ApplicationBar IsVisible="True" IsMenuEnabled="True">
            <shell:ApplicationBarIconButton IconUri="/Images/appbar_button1.png" Text="Button 1"/>
            <shell:ApplicationBarIconButton IconUri="/Images/appbar_button2.png" Text="Button 2"/>
            <shell:ApplicationBar.MenuItems>
                <shell:ApplicationBarMenuItem Text="MenuItem 1"/>
                <shell:ApplicationBarMenuItem Text="MenuItem 2"/>
            </shell:ApplicationBar.MenuItems>
        </shell:ApplicationBar>
    </phone:PhoneApplicationPage.ApplicationBar>-->

</phone:PhoneApplicationPage>


Click on Image for better View

Step 11
Now Implement code in Code behind of Main Page,it is look like this
using System;
using System.Collections.Generic;
using System.Linq;
using System.Net;
using System.Windows;
using System.Windows.Controls;
using System.Windows.Documents;
using System.Windows.Input;
using System.Windows.Media;
using System.Windows.Media.Animation;
using System.Windows.Shapes;
using Microsoft.Phone.Controls;
using System.Xml.Linq;
using System.IO.IsolatedStorage;
using System.IO;
using System.Text;
using System.Xml;

namespace SolXML_WP7
{
    public partial class MainPage : PhoneApplicationPage
    {
        #region Field
            
            private Employee EmployeeObj = null;
        
        #endregion

        // Constructor
        public MainPage()
        {
            InitializeComponent();

            // Initialize Phone Load Event using Lambda Expression
            this.Loaded += (s1, o1) =>
            {
                try
                {
                   // Check the SeesionManager Count is grether that equal to 1 or not
                    if (SessionManger.Count >= 1)
                    {
                        // if Condition true then Read a Data from Session Manager Class
                        // Bind to the Employee Object
                        EmployeeObj = SessionManger.Read<Employee>("Edit");

                         // Bind Employee Object to Content Panel DataContext to trigger the Binding Infrastructure
                        this.ContentPanel.DataContext = EmployeeObj;
                    }
                    else
                    {
                        // Create a new Instance of Employee Object and Bind to DataContext to trigger the Binding Infrastructure 
                        // Whenever the Property Changed Value it will update the valeu accordingly.
                        this.ContentPanel.DataContext = EmployeeObj = new Employee();
                    }
                }
                catch (Exception ex)
                {
                    MessageBox.Show(ex.Message);
                }
                finally
                {

                    // Remove all Session Manager 
                    SessionManger.RemoveAll();
                }
            };

            // Fire Button Click Event using Lambda Expression
            btnSubmit.Click += (s, o) =>
            {
                try
                {
                    // Store Data from UI with help of INotifyPropertyChanged
                    Boolean Flag = EmployeeOperation.SaveUpdate(EmployeeObj);

                    // Clear Field
                    EmployeeObj.FirstName = String.Empty;
                    EmployeeObj.LastName = String.Empty;
                    EmployeeObj.City = String.Empty;

                    // if Condition is true then Naviagate from MainPage to ListEmployee Page
                    // to Show data in ListBox Control
                    if (Flag == true)
                    {
                        // Navigate to ListEmployee Page
                        this.NavigationService.Navigate(new Uri("/ListEmployee.xaml", UriKind.Relative));
                    }
                }
                catch (Exception ex)
                {
                    MessageBox.Show(ex.Message); 
                }
            };

            // Fire Button View Event using Lambda Expression
            btnView.Click += (s2, o1) => 
            {
                try
                {
                    // Navigate to List Employee Page
                    this.NavigationService.Navigate(new Uri("/ListEmployee.xaml", UriKind.Relative));
                }
                catch (Exception ex)
                {
                    MessageBox.Show(ex.Message); 
                }
            };


        }

    }
}

Go to step by step,First write Page Loaded event code and then btnSubmit click event Code and finally btnViewClick event code.it's very simple.

Step 12
Now Create ListEmployee Page in Solution and Add Listbox Control in Page,it is look like this 
<Grid x:Name="ContentPanel" Grid.Row="1" Margin="12,0,12,0">
         <ListBox x:Name="lstEmployee" ItemsSource="{Binding}"  HorizontalContentAlignment="Stretch"></ListBox>      
  </Grid>


Step 13
Create a DataTemplate  for ListBox Control to display data,it is look like this
<phone:PhoneApplicationPage.Resources>
  <DataTemplate x:Key="ListBoxDataTemplate">
   
   <Border Name="border" BorderBrush="Orange" BorderThickness="2" Padding="5" Margin="5" CornerRadius="12" HorizontalAlignment="Stretch" VerticalAlignment="Stretch">
   <Grid Width="480">
    <Grid.ColumnDefinitions>
     <ColumnDefinition Width="0.275*"/>
     <ColumnDefinition Width="0.725*"/>
    </Grid.ColumnDefinitions>
    <Grid.RowDefinitions>
     <RowDefinition/>
     <RowDefinition/>
    </Grid.RowDefinitions>
    
    <Button x:Name="btnEdit" Grid.Row="0" Grid.Column="0" Width="80" Click="btnEdit_Click">
                        <Button.Background>
                            <ImageBrush ImageSource="edit.png" Stretch="Fill"/>
                        </Button.Background>
                    </Button>
    <Button x:Name="btnDelete" Grid.Row="1" Grid.Column="0" Width="80" Click="btnDelete_Click">
                        <Button.Background>
                            <ImageBrush ImageSource="delete.png" Stretch="Fill"/>
                        </Button.Background>
                    </Button>
    
    <StackPanel Grid.Row="0" Grid.Column="1" Orientation="Horizontal">
     <TextBlock Text="{Binding FirstName}" Margin="10" FontFamily="Comic Sans MS" FontSize="32" HorizontalAlignment="Left"></TextBlock>
     <TextBlock Text="{Binding LastName}" Margin="10" FontFamily="Comic Sans MS" FontSize="32" HorizontalAlignment="Left"/>
    </StackPanel>
    
    <TextBlock Grid.Row="1" Grid.Column="1" Text="{Binding City}" Margin="10" FontFamily="Comic Sans MS" FontSize="32" HorizontalAlignment="Left"></TextBlock>
   </Grid>
   </Border>
   
  </DataTemplate>
 </phone:PhoneApplicationPage.Resources>


Click on Image for better View (its Sketch diagram)

Step 13
Now a apply DataTemplate on ListBox Control,it is look like this
<Grid x:Name="ContentPanel" Grid.Row="1" Margin="12,0,12,0">
         <ListBox x:Name="lstEmployee" ItemsSource="{Binding}" ItemTemplate="{StaticResource ListBoxDataTemplate}" HorizontalContentAlignment="Stretch"></ListBox>      
  </Grid>
Full XAML Code
<phone:PhoneApplicationPage 
    x:Class="SolXML_WP7.ListEmployee"
    xmlns="http://schemas.microsoft.com/winfx/2006/xaml/presentation"
    xmlns:x="http://schemas.microsoft.com/winfx/2006/xaml"
    xmlns:phone="clr-namespace:Microsoft.Phone.Controls;assembly=Microsoft.Phone"
    xmlns:shell="clr-namespace:Microsoft.Phone.Shell;assembly=Microsoft.Phone"
    xmlns:d="http://schemas.microsoft.com/expression/blend/2008"
    xmlns:mc="http://schemas.openxmlformats.org/markup-compatibility/2006"
    FontFamily="{StaticResource PhoneFontFamilyNormal}"
    FontSize="{StaticResource PhoneFontSizeNormal}"
    Foreground="{StaticResource PhoneForegroundBrush}"
    SupportedOrientations="Portrait" Orientation="Portrait"
    mc:Ignorable="d" d:DesignHeight="768" d:DesignWidth="480"
    shell:SystemTray.IsVisible="True">
 <phone:PhoneApplicationPage.Resources>
  <DataTemplate x:Key="ListBoxDataTemplate">
   
   <Border Name="border" BorderBrush="Orange" BorderThickness="2" Padding="5" Margin="5" CornerRadius="12" HorizontalAlignment="Stretch" VerticalAlignment="Stretch">
   <Grid Width="480">
    <Grid.ColumnDefinitions>
     <ColumnDefinition Width="0.275*"/>
     <ColumnDefinition Width="0.725*"/>
    </Grid.ColumnDefinitions>
    <Grid.RowDefinitions>
     <RowDefinition/>
     <RowDefinition/>
    </Grid.RowDefinitions>
    
    <Button x:Name="btnEdit" Grid.Row="0" Grid.Column="0" Width="80" Click="btnEdit_Click">
                        <Button.Background>
                            <ImageBrush ImageSource="edit.png" Stretch="Fill"/>
                        </Button.Background>
                    </Button>
    <Button x:Name="btnDelete" Grid.Row="1" Grid.Column="0" Width="80" Click="btnDelete_Click">
                        <Button.Background>
                            <ImageBrush ImageSource="delete.png" Stretch="Fill"/>
                        </Button.Background>
                    </Button>
    
    <StackPanel Grid.Row="0" Grid.Column="1" Orientation="Horizontal">
     <TextBlock Text="{Binding FirstName}" Margin="10" FontFamily="Comic Sans MS" FontSize="32" HorizontalAlignment="Left"></TextBlock>
     <TextBlock Text="{Binding LastName}" Margin="10" FontFamily="Comic Sans MS" FontSize="32" HorizontalAlignment="Left"/>
    </StackPanel>
    
    <TextBlock Grid.Row="1" Grid.Column="1" Text="{Binding City}" Margin="10" FontFamily="Comic Sans MS" FontSize="32" HorizontalAlignment="Left"></TextBlock>
   </Grid>
   </Border>
   
  </DataTemplate>
 </phone:PhoneApplicationPage.Resources>

    <!--LayoutRoot is the root grid where all page content is placed-->
    <Grid x:Name="LayoutRoot" Background="Transparent">
        <Grid.RowDefinitions>
            <RowDefinition Height="Auto"/>
            <RowDefinition Height="*"/>
        </Grid.RowDefinitions>

        <!--TitlePanel contains the name of the application and page title-->
        <!--<StackPanel x:Name="TitlePanel" Grid.Row="0" Margin="12,17,0,28">
            <TextBlock x:Name="ApplicationTitle" Text="MY APPLICATION" Style="{StaticResource PhoneTextNormalStyle}"/>
            <TextBlock x:Name="PageTitle" Text="page name" Margin="9,-7,0,0" Style="{StaticResource PhoneTextTitle1Style}"/>
        </StackPanel>-->

        <!--ContentPanel - place additional content here-->
        <Grid x:Name="ContentPanel" Grid.Row="1" Margin="12,0,12,0">
         <ListBox x:Name="lstEmployee" ItemsSource="{Binding}" ItemTemplate="{StaticResource ListBoxDataTemplate}" HorizontalContentAlignment="Stretch"></ListBox>      
  </Grid>
    </Grid>
 
    <!--Sample code showing usage of ApplicationBar-->
    <!--<phone:PhoneApplicationPage.ApplicationBar>
        <shell:ApplicationBar IsVisible="True" IsMenuEnabled="True">
            <shell:ApplicationBarIconButton IconUri="/Images/appbar_button1.png" Text="Button 1"/>
            <shell:ApplicationBarIconButton IconUri="/Images/appbar_button2.png" Text="Button 2"/>
            <shell:ApplicationBar.MenuItems>
                <shell:ApplicationBarMenuItem Text="MenuItem 1"/>
                <shell:ApplicationBarMenuItem Text="MenuItem 2"/>
            </shell:ApplicationBar.MenuItems>
        </shell:ApplicationBar>
    </phone:PhoneApplicationPage.ApplicationBar>-->

</phone:PhoneApplicationPage>


Step 14
Now Implement code in Code behind of List Employee Page,it is look like this
using System;
using System.Collections.Generic;
using System.Linq;
using System.Net;
using System.Windows;
using System.Windows.Controls;
using System.Windows.Documents;
using System.Windows.Input;
using System.Windows.Media;
using System.Windows.Media.Animation;
using System.Windows.Shapes;
using Microsoft.Phone.Controls;

namespace SolXML_WP7
{
    public partial class ListEmployee : PhoneApplicationPage
    {
        public ListEmployee()
        {
            InitializeComponent();

            this.Loaded += (s, o) => 
            {
                try
                {
                    // Get Data from XML File
                    List<Employee> ListEmployeeObj = EmployeeOperation.GetEmployeeData();

                    // Check the ListEmployee Object is NULL or not
                    if (ListEmployeeObj != null)
                    {
                        // Check the List Employee Object Count is grather than 0 or not
                        if (ListEmployeeObj.Count > 0)
                        {
                            // Bind Employee Object to ListBox
                            this.lstEmployee.DataContext = EmployeeOperation.GetEmployeeData();
                        }
                        else
                        {
                            // If Condition is false then navigate to main Page
                            MessageBox.Show("No Record in XML File");
                            this.NavigationService.Navigate(new Uri("/MainPage.xaml", UriKind.Relative));
                        }
                    }
                    else
                    {
                        // If Condition is false then navigate to main Page
                        MessageBox.Show("No Record in XML File");
                        this.NavigationService.Navigate(new Uri("/MainPage.xaml", UriKind.Relative));
                    }
                }
                catch (Exception ex)
                {
                    MessageBox.Show(ex.Message);
                }
            };
        }

        private void btnDelete_Click(object sender, RoutedEventArgs e)
        {
            try
            {
                if (MessageBox.Show("Do you want to Delete this Record?", "XML", MessageBoxButton.OKCancel) == MessageBoxResult.OK)
                {
                    Button btnDelObj = (Button)sender;

                    if (btnDelObj != null)
                    {
                        // Check the Binding Class is Employee or Not
                        if (btnDelObj.DataContext is Employee)
                        {
                            // if Condtion is true then get data from DataContext and store in Employee Object.
                            Employee EmployeeObj = btnDelObj.DataContext as Employee;

                            // Check the Employee Object is NULL or Not
                            if (EmployeeObj != null)
                            {
                                // Delete data from XML file which user selected in ListBox
                                if (EmployeeOperation.Delete(EmployeeObj))
                                {
                                    // Again bind fresh data to ListBox
                                    this.lstEmployee.DataContext = EmployeeOperation.GetEmployeeData();
                                }
                            }
                        }
                    }
                }
            }
            catch (Exception ex)
            {
                MessageBox.Show(ex.Message);
            }
        }

        private void btnEdit_Click(object sender, RoutedEventArgs e)
        {
            try
            {
                Button btnEditObj = (Button)sender;

                if (btnEditObj != null)
                {
                    // Check the Binding Class is Employee or Not
                    if (btnEditObj.DataContext is Employee)
                    {
                        // if Condtion is true then get data from DataContext and store in Employee Object.
                        Employee EmployeeObj = btnEditObj.DataContext as Employee;

                        // Check the Employee Object is NULL or Not
                        if (EmployeeObj != null)
                        {
                            // Now add this data to Seesion Manager which user selected in ListBox
                            SessionManger.Add<Employee>("Edit", EmployeeObj);
                            // and then navigate to main Page to display data in Controls
                            this.NavigationService.Navigate(new Uri("/MainPage.xaml", UriKind.Relative));
                        }
                    }
                }
            }
            catch (Exception ex)
            {
                MessageBox.Show(ex.Message); 
            }
        }
    }
}

In Page load Event First Bind the data to the ListBox Control and write code on Delete Button Click event to call Delete  function to delete data from XML file and Finally write code on Edit button click event to navigate to main page to display selected data using SessionManager.

Run the Project.

Output


Click on Image for better View


Download
Download Source Code

Sunday, July 7, 2013

Silverlight - DataGrid RowDetailsTemplate in Silverlight 5

RowDetailsTemplate is a great feature that to view details information about a bound row in a DataGrid on demand so that the details portion is displayed in place within the DataGrid.

The DataGrid.RowDetailsTemplate property accepts a data template  that can be used to display additional data in place, associated with a bound row. This feature comes handy in many scenarios—to provide master-detail data where multiple detail records need to be displayed for a top-level row or where additional information, not otherwise bound to top-level columns, needs to be displayed adjacent to a row.

The DataGrid.RowDetailsVisibilityMode property controls the visibility of the row details information at DataGrid scope. That is, setting it to Visible keeps it always visible for every bound row, whereas setting it to Visible When Selected makes the details portion of a row visible when the row is selected and collapsed back when selection moves off to another row. To control row details visibility in code, set this property to Collapsed, which hides row details for every row, and instead use the DataGridRow.DetailsVisibility property on the individual row.

Let See how to use RowDetailsTemplate in DataGrid.

Step 1
Download Northwind database from the following link.
http://www.microsoft.com/downloads/details.aspx?FamilyID=06616212-0356-46a0-8da2-eebc53a68034&displaylang=en

Step 2
Attach a Northwind database into MS-SQL server.

Step 3
Download Silverlight 5 Tools for Visual Studio 2010 *
http://www.microsoft.com/en-us/download/details.aspx?id=28358

No need to Install Silverlight 5 tools in Visual Studio 2012

Step 4
Create a Silverlight Application and give the solution name as SolDataGridRowDetailTemplate_ExpandCollapse_SL.


Click on image for better view

Note: Select Web Project Type as ASP.NET Web site.

Step 5
 Install Entity Framework 5 from Nuget Package Source.it is look like this


Step 6
Select ASP.net Web project(SolDataGridRowDetailTemplate_ExpandCollapse_SL.Web) and right click on web project,select Add ASP.Net Folder and add App_Code folder in Solution.

In App_Code folder Create a another folder Name EF.


Click on image for better view

Step 7
Select EF folder and Right click on EF folder,Select Add New Item from Context menu,select ADO.NET Entity Data Model from Templates and rename the file as NorthwindModel.edmx, Click on Add button.it's look like this.


Click on image for better view

Generate Model from Database,it is look like this


Click on image for better view

Connect Database to the Application,it is look like this.


Click on image for better view

Select Northwind Database and Save Entity Connection String in Web.Config File.

Select Database Objects.it is look like this


Click on image for better view

Select Employee table and click on Finish button.

Now Entities Created based on table,it is look like this


Click on image for better view

Step 8
Select a ASP.net Web application(SolDataGridRowDetailTemplate_ExpandCollapse_SL.Web) and Add a WCF Service,right click on solution,select Add New Item,select WCF Service from installed Visual Studio templates and name it NorthwindService.svc and click on add button.


it will add two CS file in App_Code Folder I.E.(INorthwindService.cs,NorthwindService.cs)


Click on image for better view

Step 9
Now we will make some modification to the OperationContract. Remove default DoWork method from the INorthwindService interface.Add a new Method named as GetEmployeeData which return List<EF.Employee>,it is look like this
using System;
using System.Collections.Generic;
using System.Linq;
using System.Runtime.Serialization;
using System.ServiceModel;
using System.Text;

// NOTE: You can use the "Rename" command on the "Refactor" menu to change the interface name "INorthwindService" in both code and config file together.
[ServiceContract]
public interface INorthwindService
{
    [OperationContract]
    List<EF.Employee> GetEmployeeData();

}


Step 10
Implement INorthwindService interface in NorthwindService class and get Employee data from databse,it is look like this
using System;
using System.Collections.Generic;
using System.Linq;
using System.Runtime.Serialization;
using System.ServiceModel;
using System.Text;

// NOTE: You can use the "Rename" command on the "Refactor" menu to change the class name "NorthwindService" in code, svc and config file together.
public class NorthwindService : INorthwindService
{
    public List<EF.Employee> GetEmployeeData()
    {
        try
        {
            EF.NorthwindEntities NEObj = new EF.NorthwindEntities();

            // Using Linq Query
            //var Query = (from Q in NEObj.Employees
            //             select new
            //             {
            //                 FirstName = Q.FirstName,
            //                 LastName = Q.LastName,
            //                 City = Q.City,
            //                 Notes = Q.Notes
            //             }).ToList().Select(E => new EF.Employee() 
            //             { FirstName = E.FirstName, LastName = E.LastName, City = E.City, Notes = E.Notes });


            // Using Lambda Expression
            var Query = NEObj.Employees
            .Select(LE => new { FirstName = LE.FirstName, LastName = LE.LastName, City = LE.City, Notes = LE.Notes }).ToList()
            .Select(E => new EF.Employee() { FirstName = E.FirstName, LastName = E.LastName, City = E.City, Notes = E.Notes });

            return Query.ToList();
        }
        catch (Exception ex)
        {
            throw new Exception(ex.Message); 
        }
    }
}

Step 11
Add a reference of  WCF Service in silverlight application(SolDataGridRowDetailTemplate_ExpandCollapse_SL).Right click the Silverlight project and add a Service reference,it is look like this


Click on image for better view

Step 12

Add a WCF service in the silverlight application.Add Service Reference dialog box will open and click on Discover button and give the namesapace name as NorthwindServiceReference,it's look like this


Click on image for better view

Step 13
Now Add DataGrid Control from ToolBox in Page,it is look like this
<Grid x:Name="LayoutRoot" Background="White">

        <sdk:DataGrid x:Name="dgEmployee" Grid.Row="0" Grid.Column="0" GridLinesVisibility="All" AutoGenerateColumns="False" IsReadOnly="True"  ItemsSource="{Binding}" RowDetailsVisibilityMode="Collapsed" RowBackground="#AA0481FD" AlternatingRowBackground="#FF4B707E">
            
        </sdk:DataGrid>
       
    </Grid>

Note: In the DataGrid set the RowDetailsVisibilityMode to collapse. This will ensure that row is not expanded when user clicks on the row.

Step 14
Select DataGrid and Add DataGridTemplateColumn in DataGrid where we add Button control in Column to expand or collapse the DetaileRow.,it is look like this
<Grid x:Name="LayoutRoot" Background="White">

        <sdk:DataGrid x:Name="dgEmployee" Grid.Row="0" Grid.Column="0" GridLinesVisibility="All" AutoGenerateColumns="False" IsReadOnly="True"  ItemsSource="{Binding}" RowDetailsVisibilityMode="Collapsed" RowBackground="#AA0481FD" AlternatingRowBackground="#FF4B707E">
            <sdk:DataGrid.Columns>
                <sdk:DataGridTemplateColumn>
                    <sdk:DataGridTemplateColumn.CellTemplate>
                        <DataTemplate>
                            <Button x:Name="btnExpandCollapse" Content="+" Click="btnExpandCollapse_Click"></Button>
                        </DataTemplate>
                    </sdk:DataGridTemplateColumn.CellTemplate>
                </sdk:DataGridTemplateColumn>
            </sdk:DataGrid.Columns>
        </sdk:DataGrid>
       
    </Grid>


Click on image for better view

Step 15
Select DataGrid Control and Add three DataGridTextColumn in DataGrid where we bind Employee details such as FirstName,LastName and City,it is look like this
<Grid x:Name="LayoutRoot" Background="White">

        <sdk:DataGrid x:Name="dgEmployee" Grid.Row="0" Grid.Column="0" GridLinesVisibility="All" AutoGenerateColumns="False" IsReadOnly="True"  ItemsSource="{Binding}" RowDetailsVisibilityMode="Collapsed" RowBackground="#AA0481FD" AlternatingRowBackground="#FF4B707E">
            <sdk:DataGrid.Columns>
                <sdk:DataGridTemplateColumn>
                    <sdk:DataGridTemplateColumn.CellTemplate>
                        <DataTemplate>
                            <Button x:Name="btnExpandCollapse" Content="+" Click="btnExpandCollapse_Click"></Button>
                        </DataTemplate>
                    </sdk:DataGridTemplateColumn.CellTemplate>
                </sdk:DataGridTemplateColumn>
               
                <sdk:DataGridTextColumn Header="FirstName" Binding="{Binding FirstName}"/>
                <sdk:DataGridTextColumn Header="LastName" Binding="{Binding LastName}"/>
                <sdk:DataGridTextColumn Header="City" Binding="{Binding City}"/>
            </sdk:DataGrid.Columns>
           
        </sdk:DataGrid>
       
    </Grid>


Click on image for better view

Step 16
Now finally add RowDetailsTemplate in DataGrid to display addition data in place, associated with a bound row.it is look like this
<Grid x:Name="LayoutRoot" Background="White">

        <sdk:DataGrid x:Name="dgEmployee" Grid.Row="0" Grid.Column="0" GridLinesVisibility="All" AutoGenerateColumns="False" IsReadOnly="True"  ItemsSource="{Binding}" RowDetailsVisibilityMode="Collapsed" RowBackground="#AA0481FD" AlternatingRowBackground="#FF4B707E">
            <sdk:DataGrid.Columns>
                <sdk:DataGridTemplateColumn>
                    <sdk:DataGridTemplateColumn.CellTemplate>
                        <DataTemplate>
                            <Button x:Name="btnExpandCollapse" Content="+" Click="btnExpandCollapse_Click"></Button>
                        </DataTemplate>
                    </sdk:DataGridTemplateColumn.CellTemplate>
                </sdk:DataGridTemplateColumn>
               
                <sdk:DataGridTextColumn Header="FirstName" Binding="{Binding FirstName}"/>
                <sdk:DataGridTextColumn Header="LastName" Binding="{Binding LastName}"/>
                <sdk:DataGridTextColumn Header="City" Binding="{Binding City}"/>
            </sdk:DataGrid.Columns>
            
            <sdk:DataGrid.RowDetailsTemplate>
                <DataTemplate>
                    <Border BorderThickness="2" CornerRadius="5" Background="LightBlue"  HorizontalAlignment="Stretch">
                        <TextBlock Text="{Binding Notes}" Width="400" HorizontalAlignment="Left" TextWrapping="Wrap" Margin="20,0,0,0"></TextBlock>
                    </Border>
                </DataTemplate>
            </sdk:DataGrid.RowDetailsTemplate>

        </sdk:DataGrid>
       
    </Grid>


Click on image for better view

Full XAML Code
<UserControl
    xmlns="http://schemas.microsoft.com/winfx/2006/xaml/presentation"
    xmlns:x="http://schemas.microsoft.com/winfx/2006/xaml"
    xmlns:d="http://schemas.microsoft.com/expression/blend/2008"
    xmlns:mc="http://schemas.openxmlformats.org/markup-compatibility/2006"
    xmlns:sdk="http://schemas.microsoft.com/winfx/2006/xaml/presentation/sdk" 
    x:Class="SolDataGridRowDetailTemplate_ExpandCollapse_SL.MainPage"
    mc:Ignorable="d"
    d:DesignHeight="300" d:DesignWidth="400">

    <Grid x:Name="LayoutRoot" Background="White">

        <sdk:DataGrid x:Name="dgEmployee" Grid.Row="0" Grid.Column="0" GridLinesVisibility="All" AutoGenerateColumns="False" IsReadOnly="True"  ItemsSource="{Binding}" RowDetailsVisibilityMode="Collapsed" RowBackground="#AA0481FD" AlternatingRowBackground="#FF4B707E">
            <sdk:DataGrid.Columns>
                <sdk:DataGridTemplateColumn>
                    <sdk:DataGridTemplateColumn.CellTemplate>
                        <DataTemplate>
                            <Button x:Name="btnExpandCollapse" Content="+" Click="btnExpandCollapse_Click"></Button>
                        </DataTemplate>
                    </sdk:DataGridTemplateColumn.CellTemplate>
                </sdk:DataGridTemplateColumn>
               
                <sdk:DataGridTextColumn Header="FirstName" Binding="{Binding FirstName}"/>
                <sdk:DataGridTextColumn Header="LastName" Binding="{Binding LastName}"/>
                <sdk:DataGridTextColumn Header="City" Binding="{Binding City}"/>
             
            </sdk:DataGrid.Columns>
            
            <sdk:DataGrid.RowDetailsTemplate>
                <DataTemplate>
                    <Border BorderThickness="2" CornerRadius="5" Background="LightBlue"  HorizontalAlignment="Stretch">
                        <TextBlock Text="{Binding Notes}" Width="400" HorizontalAlignment="Left" TextWrapping="Wrap" Margin="20,0,0,0"></TextBlock>
                    </Border>
                </DataTemplate>
            </sdk:DataGrid.RowDetailsTemplate>

        </sdk:DataGrid>
       
    </Grid>
</UserControl>

Step 17
Bind the data to DataGrid Control in Code Behind on UserControl Load Event using Lambda Expression,it is look like this
public MainPage()
        {
            InitializeComponent();

            /// Initialize Load Event using Lambda Expression
            this.Loaded += (s, o) => 
            {
                try
                {
                    // Call WCF Service
                    NorthwindServiceReference.NorthwindServiceClient NCRobj = new NorthwindServiceReference.NorthwindServiceClient();

                    // Wire up the Async Completed  handler Using Lambda Expression
                    NCRobj.GetEmployeeDataCompleted += (sender, e) =>
                    {
                        // Bind Employee Data to DataGrid Control
                        dgEmployee.DataContext = e.Result;
                    };

                    // Call WCF Method
                    NCRobj.GetEmployeeDataAsync();

                }
                catch (Exception ex)
                {
                    MessageBox.Show(ex.Message); 
                }
            };
        }

Step 18
On Button ExapndCollapse Click event,add the following code,it is look like this 
private void btnExpandCollapse_Click(object sender, RoutedEventArgs e)
        {
            try
            {
                // Get the Selected Row Button Object  
                Button ExpandCollapseObj = (Button)sender; 

                // Check the Button Object is null or Not  
                if (ExpandCollapseObj != null)
                {
                    // Return the Contains which specified element  
                    DataGridRow DgrSelectedRowObj = DataGridRow.GetRowContainingElement(ExpandCollapseObj);

                    if (DgrSelectedRowObj != null)
                    {
                        // if Button Content is "+" then Visible Row Details   
                        if (ExpandCollapseObj != null && ExpandCollapseObj.Content.ToString() == "+")
                        {
                            DgrSelectedRowObj.DetailsVisibility = System.Windows.Visibility.Visible;
                            ExpandCollapseObj.Content = "-";
                        }
                        // else Collapsed row Details  
                        else
                        {
                            DgrSelectedRowObj.DetailsVisibility = System.Windows.Visibility.Collapsed;
                            ExpandCollapseObj.Content = "+";
                        }  
                    }
                }
            }
            catch (Exception ex)
            {
                MessageBox.Show(ex.Message); 
            }
        }

Full Code
using System;
using System.Collections.Generic;
using System.Linq;
using System.Net;
using System.Windows;
using System.Windows.Controls;
using System.Windows.Documents;
using System.Windows.Input;
using System.Windows.Media;
using System.Windows.Media.Animation;
using System.Windows.Shapes;

namespace SolDataGridRowDetailTemplate_ExpandCollapse_SL
{
    public partial class MainPage : UserControl
    {
        public MainPage()
        {
            InitializeComponent();

            /// Initialize Load Event using Lambda Expression
            this.Loaded += (s, o) => 
            {
                try
                {
                    // Call WCF Service
                    NorthwindServiceReference.NorthwindServiceClient NCRobj = new NorthwindServiceReference.NorthwindServiceClient();

                    // Wire up the Async Completed  handler Using Lambda Expression
                    NCRobj.GetEmployeeDataCompleted += (sender, e) =>
                    {
                        // Bind Employee Data to DataGrid Control
                        dgEmployee.DataContext = e.Result;
                    };

                    // Call WCF Method
                    NCRobj.GetEmployeeDataAsync();

                }
                catch (Exception ex)
                {
                    MessageBox.Show(ex.Message); 
                }
            };
        }

        private void btnExpandCollapse_Click(object sender, RoutedEventArgs e)
        {
            try
            {
                // Get the Selected Row Button Object  
                Button ExpandCollapseObj = (Button)sender; 

                // Check the Button Object is null or Not  
                if (ExpandCollapseObj != null)
                {
                    // Return the Contains which specified element  
                    DataGridRow DgrSelectedRowObj = DataGridRow.GetRowContainingElement(ExpandCollapseObj);

                    if (DgrSelectedRowObj != null)
                    {
                        // if Button Content is "+" then Visible Row Details   
                        if (ExpandCollapseObj != null && ExpandCollapseObj.Content.ToString() == "+")
                        {
                            DgrSelectedRowObj.DetailsVisibility = System.Windows.Visibility.Visible;
                            ExpandCollapseObj.Content = "-";
                        }
                        // else Collapsed row Details  
                        else
                        {
                            DgrSelectedRowObj.DetailsVisibility = System.Windows.Visibility.Collapsed;
                            ExpandCollapseObj.Content = "+";
                        }  
                    }
                }
            }
            catch (Exception ex)
            {
                MessageBox.Show(ex.Message); 
            }
        }
    }
}

Output

Download
Download Source Code