What is Sqlite?
SqlLite is free,self-contained, serverless, zero-configuration, transactional SQL database engine.Unlike SQL Server, Oracle or other commercial database, it's not a stand alone program. It doesn't have a server. It's a very small code library written in C which other applications (yours) can call.
The entire database is stored in a single file, which means your application or website can utilize a fully functional relational database without the constraints or costs of a traditional database server.
SQLite supports most of the standard SQL language, with some limitations.The tables and data, triggers, foreign keys and constraints are all stored in this file. Your application reads and writes to the database by calling SQLite. When you do a SELECT or UPDATE, SQLite reads and writes to the file. If you do your updates inside a SQL transaction, SQLite makes sure you have exclusive access to the file. You can back up your database by making a copy of the database file. In short, you can use SQLite just like you would use any other database, but behind the scenes you are calling a small code library which is storing your data in a file.
So when you don’t want to shell out the cash for SQL Server, your host doesn’t offer MySQL, and you’re tired of dancing around XML files(Really i danced with XML file with my friend Ramdas but it's still my favorite because of LINQ to XML(XQuery) Support) as a database alternative, you can turn to SQLite!
Let see how to use SQLite in .Net Platform.
Step 1
Download ADO.NET data provider for SQLite:
SQLite has an API written in C. In .Net terms, this makes SQLite unmanaged code. Fortunately, SQLite also provides a good open source ADO.NET data provider.Using the data provider, you can access a SQLite database just like you would SQL Server or other commercial databases.
Download SQLite ADO.net Data Provider
First download the data provider and run the installer. The installation files include several .dlls, including System.Data.SQLite.dll and System.Data.SQLite.Linq.dll. System.Data.SQLite contains the entire SQLite code library plus the ADO.net wrapper.
Step 2
Download GUI Tool for SQLite:
SQLite Administrator is a great little freeware tool supporting multiple languages and many features.
Download SQLite Admin
Step 3
Download Northwind Database.
Northwind
Step 4
Create a New ASP.net Web site and give the solution name as SolSqliteFetchData.
Step 5
Add a Assembly reference to the project,it is look like this
Right click on the project name in Solution Explorer, select Add Reference and select System.Data.SQLite in .NET Tab and select OK button.

Click on Image for better view
Step 6
Copy Northwind database file in App_Data folder,it is look like this

Click on Image for better view
Step 7
Create a Employee static class in app_code folder for retriving an employee data from database,it is look like this
using System; using System.Collections.Generic; using System.Linq; using System.Web; using System.Text; using System.Data; using System.Data.SQLite; ////// Summary description for Employee /// public static class Employee { #region Methods ////// Get Employee Data from Database /// ///DataTable public static DataTable GetEmployeeData() { try { StringBuilder ConnectionString = new StringBuilder(); ConnectionString.Append("Data Source="); ConnectionString.Append(HttpContext.Current.Server.MapPath("~/App_Data/Northwind.s3db")); ConnectionString.Append(";Version=3;New=False;Compress=True;"); SQLiteConnection SqliteCon = new SQLiteConnection(ConnectionString.ToString()); SqliteCon.Open(); DataTable Table = new DataTable(); SQLiteDataAdapter SqliteDa = new SQLiteDataAdapter("SELECT FirstName,LastName,City FROM Employees", SqliteCon); SqliteDa.Fill(Table); return Table; } catch (Exception ex) { throw new Exception(ex.Message); } } #endregion }
Step 8
Add a Gridview in page for binding employee data,it is look like this
<div>
        <asp:GridView ID="GVEmployee" runat="server" AutoGenerateColumns="False"
            BackColor="White" BorderColor="#999999" BorderStyle="Solid" BorderWidth="1px"
            CellPadding="3" EnableModelValidation="True" ForeColor="Black"
            GridLines="Vertical">
            <AlternatingRowStyle BackColor="#CCCCCC" />
            <Columns>
                <asp:BoundField DataField="FirstName" HeaderText="FirstName" />
                <asp:BoundField DataField="LastName" HeaderText="LastName" />
                <asp:BoundField DataField="City" HeaderText="City" />
            </Columns>
            <FooterStyle BackColor="#CCCCCC" />
            <HeaderStyle BackColor="Black" Font-Bold="True" ForeColor="White" />
            <PagerStyle BackColor="#999999" ForeColor="Black" HorizontalAlign="Center" />
            <SelectedRowStyle BackColor="#000099" Font-Bold="True" ForeColor="White" />
        </asp:GridView>
    </div>

Click on Image for better view
Step 9
Bind the employee data in gridview.it is look like this
using System;
using System.Collections.Generic;
using System.Linq;
using System.Web;
using System.Web.UI;
using System.Web.UI.WebControls;
using System.Data;

public partial class _Default : System.Web.UI.Page
{
    protected void Page_Load(object sender, EventArgs e)
    {
        try
        {
            if (IsPostBack == false)
            {
                BindEmployeeData();
            }
        }
        catch(Exception)
        {
        }
    }

    #region Methods

    ///
    /// Bind Employee Data to the GridView
    ///
    private void BindEmployeeData()
    {
        try
        {
            DataTable Table = Employee.GetEmployeeData();

            if (Table != null)
            {
                if (Table.Rows.Count >= 1)
                {
                    GVEmployee.DataSource = Table;
                    GVEmployee.DataBind();
                }
            }
        }
        catch (Exception ex)
        {
            throw new Exception(ex.Message);
        }
    }

    #endregion
}
Run the Project.
Note
if you are using .Net 4 Framework then you should add the following lines to your app.config files
Full .aspx Code
<%@ Page Language="C#" AutoEventWireup="true"  CodeFile="Default.aspx.cs" Inherits="_Default" %>

<!DOCTYPE html PUBLIC "-//W3C//DTD XHTML 1.0 Transitional//EN" "http://www.w3.org/TR/xhtml1/DTD/xhtml1-transitional.dtd">

<html xmlns="http://www.w3.org/1999/xhtml">
<head runat="server">
    <title></title>
</head>
<body>
    <form id="form1" runat="server">
    <div>
        <asp:GridView ID="GVEmployee" runat="server" AutoGenerateColumns="False"
            BackColor="White" BorderColor="#999999" BorderStyle="Solid" BorderWidth="1px"
            CellPadding="3" EnableModelValidation="True" ForeColor="Black"
            GridLines="Vertical">
            <AlternatingRowStyle BackColor="#CCCCCC" />
            <Columns>
                <asp:BoundField DataField="FirstName" HeaderText="FirstName" />
                <asp:BoundField DataField="LastName" HeaderText="LastName" />
                <asp:BoundField DataField="City" HeaderText="City" />
            </Columns>
            <FooterStyle BackColor="#CCCCCC" />
            <HeaderStyle BackColor="Black" Font-Bold="True" ForeColor="White" />
            <PagerStyle BackColor="#999999" ForeColor="Black" HorizontalAlign="Center" />
            <SelectedRowStyle BackColor="#000099" Font-Bold="True" ForeColor="White" />
        </asp:GridView>
    </div>
    </form>
</body>
</html>
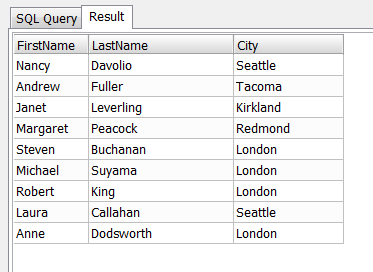
Output

GUI - SQLite Admin

Click on Image for better view
Click on Image for better view
Download
Download Source Code