Portable Class Library is also called as PCL. PCL support the cross platform development of .Net Framework application.Its come with Framework 4.5 and project template available on Visual Studio 2012 & 2013.
With portable class libraries,we can write portable assemblies that share code with WPF, Silverlight, Window Phone Silverlight, Window App Store(WinRT), Window Phone WinRT & XBox.You can combine with Xamarin,we can target other platform such as IOS,Android and MAC (Currently i did not Install Xamarin on my machine).Portable class libraries can help you reduce the time and costs of developing and testing code.
Why we need Portable Class Library???
Time is changing, people want the same application on all platforms to make life easy. An example is if you are working in an Office then probably you use a Desktop application or web application. If you are traveling then at that time you use your tab or mobile app. In other words, the same application is used on multiple platforms. Microsoft technology is growing day by day and it’s covered end to end with software for nearly every device, all types applications you can build and validate within one framework on all types of platforms, Windows, Web, Mobile or Tab.
Portable Class Library (PCL) for developing your business logic in one location and you can use this library end to end in all types of applications or all platforms (Windows, web or Mobile) on the .Net Framework. In a single word, the Portable Class Library (PCL) allows the targeting of a set of platforms.In short i can say that,we need to prepare the UI for all platforms and do the Data Binding of your application to be ready for all Windows, web and Mobile, because your same business logic can then use all platforms.
Portable Class Library (PCL) for developing your business logic in one location and you can use this library end to end in all types of applications or all platforms (Windows, web or Mobile) on the .Net Framework. In a single word, the Portable Class Library (PCL) allows the targeting of a set of platforms.In short i can say that,we need to prepare the UI for all platforms and do the Data Binding of your application to be ready for all Windows, web and Mobile, because your same business logic can then use all platforms.

Click on image for better view
In this article,we are going to use MVVM(Model - View - ViewModel) pattern with portable class library. MVVM is an application pattern that isolates the user interface from the underlying business logic. You can implement the model and view model classes in a Portable Class Library project in Visual Studio 2012 & 2013, and then create views that are customized for different platforms. This approach enables you to write the data model and business logic only once, and use that code from WPF, Silverlight, Windows Phone, and Windows Store apps, as shown in the following illustration.

Click on image for better view
Note : This topic does not provide general information about the MVVM pattern. It only provides information about how to use Portable Class Library to implement.
In this example we will read data from XML file and bind to the ListBox control of all platform.(Excluding Xbox [Xbox not installed on my machine]).
Let see how to use PCL with MVVM pattern.
Step 1
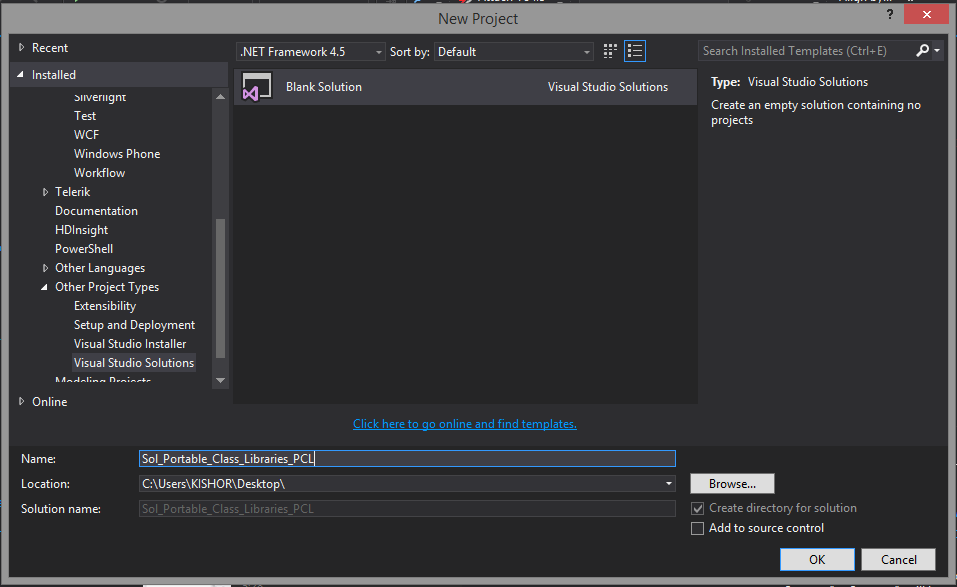
Start visual studio 2013,create a blank solution and give solution name as Sol_Portable_Class_Libraries_PCL,it's look like this
Click on image for better view
Note : Select .Net Framework 4.5
Step 2
Select a blank solution,right click on solution,add new project,Select Class Library (Portable) and give solution name as SharedProject,it is look like this

Click on image for better view
Step 3
The following window will appear,Select the following Target Framework,it is look like this

Click on image for better view
Step 4
In SharedProject Solution,Create a XML file and give the file name as EmployeeData.xml,it's look like this

Click on image for better view
Step 5
Change the build action from Content to Embedded Resource,Select XML file,right click on the file,select Property | Build Action | Embedded Resource,it's look like this

Click on image for better view
Step 6
The XML in the following example defines an XML document with a root node called Employees. This root node contains one or more nodes called Employee that include elements called FirstName,LastName and Age,it's look like this
Click on image for better view
Note : This topic does not provide general information about the MVVM pattern. It only provides information about how to use Portable Class Library to implement.
In this example we will read data from XML file and bind to the ListBox control of all platform.(Excluding Xbox [Xbox not installed on my machine]).
Let see how to use PCL with MVVM pattern.
Step 1
Start visual studio 2013,create a blank solution and give solution name as Sol_Portable_Class_Libraries_PCL,it's look like this
Click on image for better view
Note : Select .Net Framework 4.5
Step 2
Select a blank solution,right click on solution,add new project,Select Class Library (Portable) and give solution name as SharedProject,it is look like this
Click on image for better view
Step 3
The following window will appear,Select the following Target Framework,it is look like this
Click on image for better view
Step 4
In SharedProject Solution,Create a XML file and give the file name as EmployeeData.xml,it's look like this
Click on image for better view
Step 5
Change the build action from Content to Embedded Resource,Select XML file,right click on the file,select Property | Build Action | Embedded Resource,it's look like this
Click on image for better view
Step 6
The XML in the following example defines an XML document with a root node called Employees. This root node contains one or more nodes called Employee that include elements called FirstName,LastName and Age,it's look like this
<?xml version="1.0" encoding="utf-8" ?>
<Employees>
    <Employee>
      <FirstName>Kishor</FirstName>
      <LastName>Naik</LastName>
      <Age>28</Age>
    </Employee>

   <Employee>
      <FirstName>Yogesh</FirstName>
      <LastName>Naik</LastName>
      <Age>25</Age>
    </Employee>

     <Employee>
      <FirstName>Deepika</FirstName>
      <LastName>Naik</LastName>
      <Age>22</Age>
    </Employee>

</Employees>
Step 7
In sharedProject solution add three folder,it is look like this

Click on image for better view
Step 8
In Model folder,Create a EmployeeModel class and add the following code,it is look like this
using System;
using System.Collections.Generic;
using System.Linq;
using System.Text;

namespace SharedProject.Model
{
    public class EmployeeModel
    {
        #region Property

        public String FirstName { get; set; }

        public String LastName { get; set; }

        public int ? Age { get; set; }

        #endregion
    }
}
Step 9
In DAL folder,create a EmployeeDAL class to retrieve employee data from xml file,add the following code,it is look like this
using System;
using System.Collections.Generic;
using System.Linq;
using System.Reflection;
using System.Text;
using System.Xml;
using System.Xml.Linq;
using SharedProject.Model;

namespace SharedProject.DAL
{
    public class EmployeeDAL
    {
        /// <summary>
        /// Get Employee data from XML File
        /// </summary>
        /// <returns>List</returns>
        public List<EmployeeModel> GetEmployeeData()
        {
            try
            {
                // Load resources stream from the assembly
                var XMLFilePath=Assembly.GetExecutingAssembly().GetManifestResourceStream("SharedProject.EmployeeData.xml");

                // Load XML Document from Stream.
                XDocument XDoc = XDocument.Load(XMLFilePath);

                //// Using Linq Query

                //return (from Q in XDoc.Descendants("Employee")
                //    select new Employee
                //    {
                //        FirstName = Q.Element("FirstName").Value,
                //        LastName = Q.Element("LastName").Value,
                //        Age =Convert.ToInt32(Q.Element("Age").Value)
                //    }).ToList();

                // Using Lambda Query

                return XDoc.Descendants("Employee").Select(LE => new EmployeeModel()
                {
                    FirstName=LE.Element("FirstName").Value,
                    LastName=LE.Element("LastName").Value,
                    Age=Convert.ToInt32(LE.Element("Age").Value)
                }).ToList();
            }
            catch (Exception)
            {
                throw;
            }
        }
    }
}
Step 10
Now In ViewModel folder,create a EmployeeViewModel class that will used in various platforms,add the following code,it is look like this
using System;
using System.Collections.Generic;
using System.Linq;
using System.Text;
using SharedProject.Model;
using SharedProject.DAL;


namespace SharedProject.ViewModel
{
    public class EmployeeViewModel : EmployeeDAL // Inherit Base Employee DAL class to Derived ViewModel class.
    {

        #region Constructor

        public EmployeeViewModel()
        {
            // Bind Employee Data
            EmployeeData = base.GetEmployeeData();
        }

        #endregion

        #region Property

        public List<EmployeeModel> EmployeeData {get; set; }
        #endregion
    }
}
We implemented Model and ViewModel,now let us move to View.
In Blank Solution,add the following projects one by one.Select a blank solution,right click on solution,add new project,
1. Select WPF Application and give solution name as WPF_App ,it is look like this

Click on image for better view.
2. Select Silverlight Application and give solution name as SILVERLIGHT_App ,it is look like this

Click on image for better view.
3. Select Window Phone Silverlight Application and give solution name as WP_SILVERLIGHT_App ,it is look like this

Click on image for better view.
4. Select Window Phone and give solution name as WP_WINRT_App ,it is look like this

Click on image for better view.
5. Select Window App and give solution name as WSP_App ,it is look like this

Click on image for better view.
Step 12
Once all the projects loads up,we need to add portable class reference to all platforms.In Solution Explorer, Right-click on project(WPF,Silverlight,Window Phone & Window App Store),Select References and choose "Add Reference". Then select Solution | Projects and check the "SharedProject",it is look like this

Click on image for better view.
Finally it's look like this


Click on image for better view.
Select WPF_App project,In MainWindow.xaml page,add the following View Code,it is look like this
<Window x:Class="WPF_App.MainWindow"
  xmlns="http://schemas.microsoft.com/winfx/2006/xaml/presentation"
  xmlns:x="http://schemas.microsoft.com/winfx/2006/xaml"
  xmlns:Shared="clr-namespace:SharedProject.ViewModel;assembly=SharedProject"
  Title="MainWindow" Height="350" Width="525">

 <Window.Resources>

  <Shared:EmployeeViewModel x:Key="EVM"></Shared:EmployeeViewModel>

  <DataTemplate x:Key="ListBoxDataTemplate">
   <Grid Width="Auto">
    <Grid.RowDefinitions>
     <RowDefinition Height="30*"/>
     <RowDefinition Height="30*"/>
     <RowDefinition Height="30*"/>
    </Grid.RowDefinitions>

    <TextBlock Grid.Row="0" Grid.Column="0" Text="{Binding Path=FirstName, StringFormat={}FirstName : {0}}"></TextBlock>
    <TextBlock Grid.Row="1" Grid.Column="0" Text="{Binding Path=LastName, StringFormat={}LastName : {0}}"></TextBlock>
    <TextBlock Grid.Row="2" Grid.Column="0" Text="{Binding Path=Age,  StringFormat={}Age : {0}}"></TextBlock>

   </Grid>
  </DataTemplate>

 </Window.Resources>
 <Grid DataContext="{Binding Source={StaticResource EVM}}">
  <ListBox x:Name="lstEmployee" Grid.Row="0" Grid.Column="0" ItemTemplate="{StaticResource ListBoxDataTemplate}" ItemsSource="{Binding Path=EmployeeData}" HorizontalContentAlignment="Stretch" VerticalContentAlignment="Center"></ListBox>
 </Grid>
</Window>
In this above code,First we need to access our ViewModel class in XAML page.Add the following namespace to Window element attributes,just like this
<Window
xmlns:Shared="clr-namespace:SharedProject.ViewModel;assembly=SharedProject">
</Window>
Now we will need to set up the Window.Resources of our ViewModel, providing a key that we can use in XAML. Add the following inside the Window element contents,Just like this
<Window.Resources>
     <Shared:EmployeeViewModel x:Key="EVM"></Shared:EmployeeViewModel>
</Window.Resources>
In Window.Resource element define the DataTemplate for ListBox control to display data,it is look like this
<Window.Resources>

  <Shared:EmployeeViewModel x:Key="EVM"></Shared:EmployeeViewModel>

  <DataTemplate x:Key="ListBoxDataTemplate">
   <Grid Width="Auto">
    <Grid.RowDefinitions>
     <RowDefinition Height="30*"/>
     <RowDefinition Height="30*"/>
     <RowDefinition Height="30*"/>
    </Grid.RowDefinitions>

    <TextBlock Grid.Row="0" Grid.Column="0" Text="{Binding Path=FirstName, StringFormat={}FirstName : {0}}"></TextBlock>
    <TextBlock Grid.Row="1" Grid.Column="0" Text="{Binding Path=LastName, StringFormat={}LastName : {0}}"></TextBlock>
    <TextBlock Grid.Row="2" Grid.Column="0" Text="{Binding Path=Age,  StringFormat={}Age : {0}}"></TextBlock>

   </Grid>
  </DataTemplate>

</Window.Resources>
Now bind EmployeeViewModel object in Grid DataContext,it is look like this
<Grid DataContext="{Binding Source={StaticResource EVM}}">
</Grid>
Apply above DataTemplate to ListBox control,it's look like this
<Grid DataContext="{Binding Source={StaticResource EVM}}">
    <ListBox x:Name="lstEmployee" Grid.Row="0" Grid.Column="0" ItemTemplate="{StaticResource ListBoxDataTemplate}" HorizontalContentAlignment="Stretch" VerticalContentAlignment="Center"></ListBox>
</Grid>
Finally bind EmployeeData to ListBox ItemSource Property its look like this
<Grid DataContext="{Binding Source={StaticResource EVM}}">
  <ListBox x:Name="lstEmployee" Grid.Row="0" Grid.Column="0" ItemTemplate="{StaticResource ListBoxDataTemplate}" ItemsSource="{Binding Path=EmployeeData}" HorizontalContentAlignment="Stretch" VerticalContentAlignment="Center"></ListBox>
</Grid>
The same view code apply on every platforms.(In other platforms you have to use Page or UserControl Element )
Run the Project.
Output
1.WPF
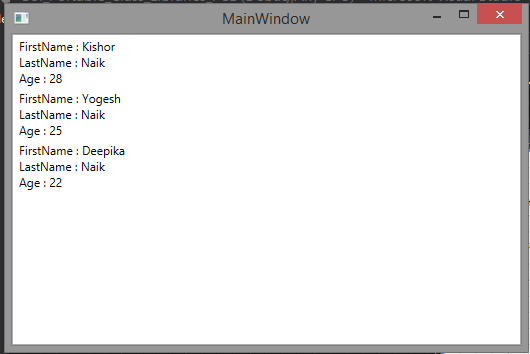
Click on image for better view.
2.SILVERLIGHT

Click on image for better view.
3. Window Phone Silverlight

Click on image for better view.
Click on image for better view.
4. Window Phone 8.1 (WinRT)

5. Window App Store (WinRT)
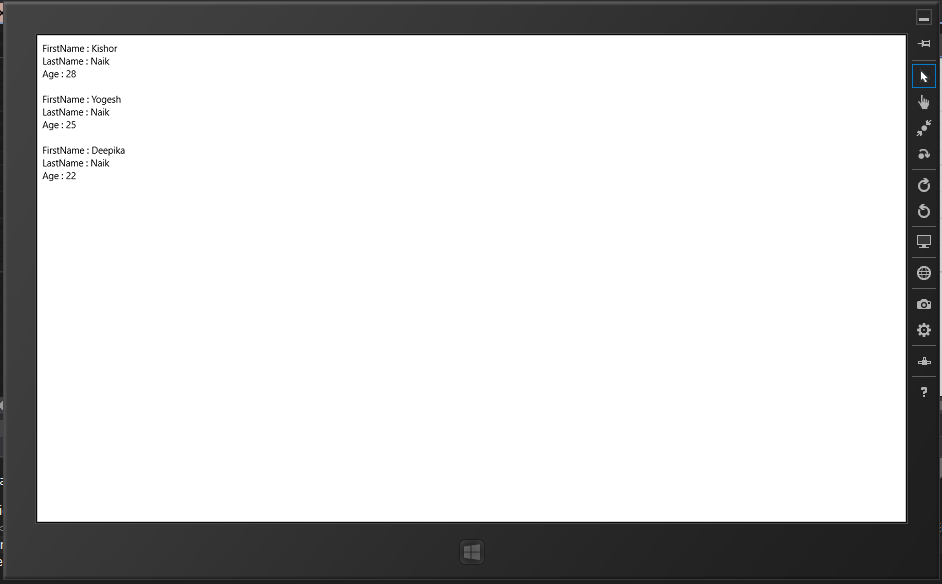
Click on image for better view.
Download
Download Source Code